

Create a simple multi-page webapp#
Prerequisites#
Some familiarity with HTML, CSS, and Dash for the front-end
Some familiarity with Python for the backend
An existing Dataiku Project in which you have the “write project content” permissions
A Python code environment with
dashanddash-bootstrap-componentspackages installed (see the documentation for more details)
Note
This tutorial used python==3.9, dash==3.0.4, and dash-bootstrap-components==2.0.2,
but other versions could work.
Introduction#
In this tutorial, we’ll create a simple multi-page web application to understand the underlying principles. Multi-page webapps are beneficial when we can visually separate content into distinct areas, allowing for a more focused and logically organized layout. This approach creates an application that spans multiple screens, with shared facilities between them.
To create an empty Dash webapp, please refer to this mini-tutorial.
Start with an empty template#
In the “Python” tab, we will replace the existing code with Code 1. Line 6 specifies the theme used for the webapp. After clicking the Save button, we should land on a page similar to Fig. 1.
 1# Import necessary libraries
 2from dash import html, dcc
 3import dash_bootstrap_components as dbc
 4
 5# use the style of examples on the Plotly documentation
 6app.config.external_stylesheets = [dbc.themes.SUPERHERO]
 7
 8nav_layout = html.Div([
 9    dbc.NavbarSimple(
10        children=[
11            dbc.NavItem(dbc.NavLink("Page 1", href="page1")),
12            dbc.NavItem(dbc.NavLink("Page 2", href="page2")),
13        ] ,
14        brand="Multi-page Dash App",
15        brand_href="home",
16        fluid=True,
17        color="dark",
18        dark=True,
19    ),
20])
21
22# Define the index page layout
23app.layout = nav_layout
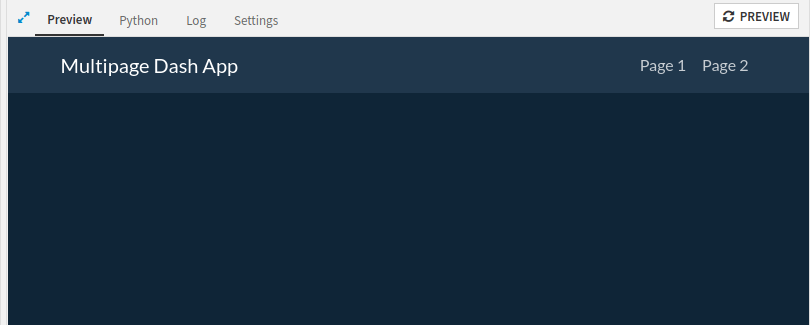
Figure 1: The very first rendering#
Next, we will define and add two empty templates to the webapp. After line 20, we will add two templates, as shown in Code 2.
page1_layout = html.Div([
    html.H2("Page 1")
])

page2_layout = html.Div([
    html.H2("Page 2")
])
Once we have these two templates, we can build the multi-page webapp. For this, we need to create an application layout. Some components will be shared by the whole application, the navigation bar, for example, or a footer. And some content is displayed only when navigating from one page to another. Code 3 shows how to write the application layout. The highlighted line will be used to display the specific content.
1home_layout = html.Div([
2    nav_layout,
3    html.H1("Global shared components"),
4    html.Div(id='page-content'),
5    html.Footer("We can even have a footer")
6])
7
8app.layout = home_layout
Complete code and conclusion#
Code 7 shows the complete code of this multi-page webapp. This tutorial demonstrates how to create a multi-page webapp. It is easily extendable for many more pages. Depending on the use case, we can use the most straightforward way or provide a more robust way to navigate from one page to another.
# Import necessary libraries
from dash import html
from dash import dcc
from dash import dash_table
import dash_bootstrap_components as dbc
from dash.dependencies import Input
from dash.dependencies import Output
from dash.dependencies import State
from dash.exceptions import PreventUpdate
import logging
logger = logging.getLogger(__name__)
# use the style of examples on the Plotly documentation
app.config.external_stylesheets = [dbc.themes.SUPERHERO]
nav_layout = html.Div([
dbc.NavbarSimple(
children=[
dbc.NavItem(dbc.NavLink("Page 1", href="page1")),
dbc.NavItem(dbc.NavLink("Page 2", href="page2")),
] ,
brand="Multi-page Dash App",
brand_href="home",
fluid=True,
color="dark",
dark=True,
),
])
page1_layout = html.Div([
html.H2("Page 1"),
])
page2_layout = html.Div([
html.H2("Page 2"),
])
index_layout = html.Div([
html.H2("Index"),
])
home_layout = html.Div([
    dcc.Store(id='root-url', storage_type = 'local', clear_data=True),
    dcc.Store(id='loaded', storage_type = 'local', clear_data=True, data=False),
    dcc.Location(id='url', refresh=False),
    nav_layout,
    html.H1("Global shared components"),
    html.Div(id='page-content'),
    html.Footer("We can even have a footer")
])
# Define the index page layout
app.layout = home_layout
# The following callback is used to dynamically instantiate the root-url when the webapp is launched
@app.callback([
Output('root-url', 'data'),
Output('loaded', 'data')],
Input('url', 'pathname'),
State('loaded', 'data')
)
def update_root_url(url, loaded):
if not loaded:
return url, True
else:
raise PreventUpdate
# When the URL changes, update the content
@app.callback(Output('page-content', 'children'),
[Input('url', 'pathname')],
[State('root-url', 'data'),
State('loaded', 'data')],
prevent_initial_call=True)
def display_page(pathname, root_url, is_loaded):
logger.info(f"Root URL: {pathname}")
if is_loaded:
if pathname == root_url + 'page1':
logger.info("## Page1")
return page1_layout
elif pathname == root_url + 'page2':
logger.info("## Page 2")
return page2_layout
elif pathname == root_url + 'home':
logger.info("## Index")
return index_layout
else:
return index_layout
else:
return index_layout