

Basic setup: Deploy your web application#
This tutorial guides you through deploying a web application created within the Code Studio, transforming and deploying it as a standard Dataiku web application.
Tip
Updating an Existing Deployment
If you’ve previously deployed a web application and wish to update it, you can simply Build the webapp, Synchronize the files, and restart your web application backend.
Step 1: Building the application#
Open your terminal and navigate to the project folder. Replace
__PROJECT_NAME__with the actual name of your project directory:cd ~/workspace/project-lib-versioned/webapps/__PROJECT_NAME__
Execute the appropriate build command based on your choice of package manager:
yarn run build
Upon successful compilation, the built files will be located in the
distfolder under the directory path/workspace/project-lib-versioned/webapps/__PROJECT_NAME__/dist
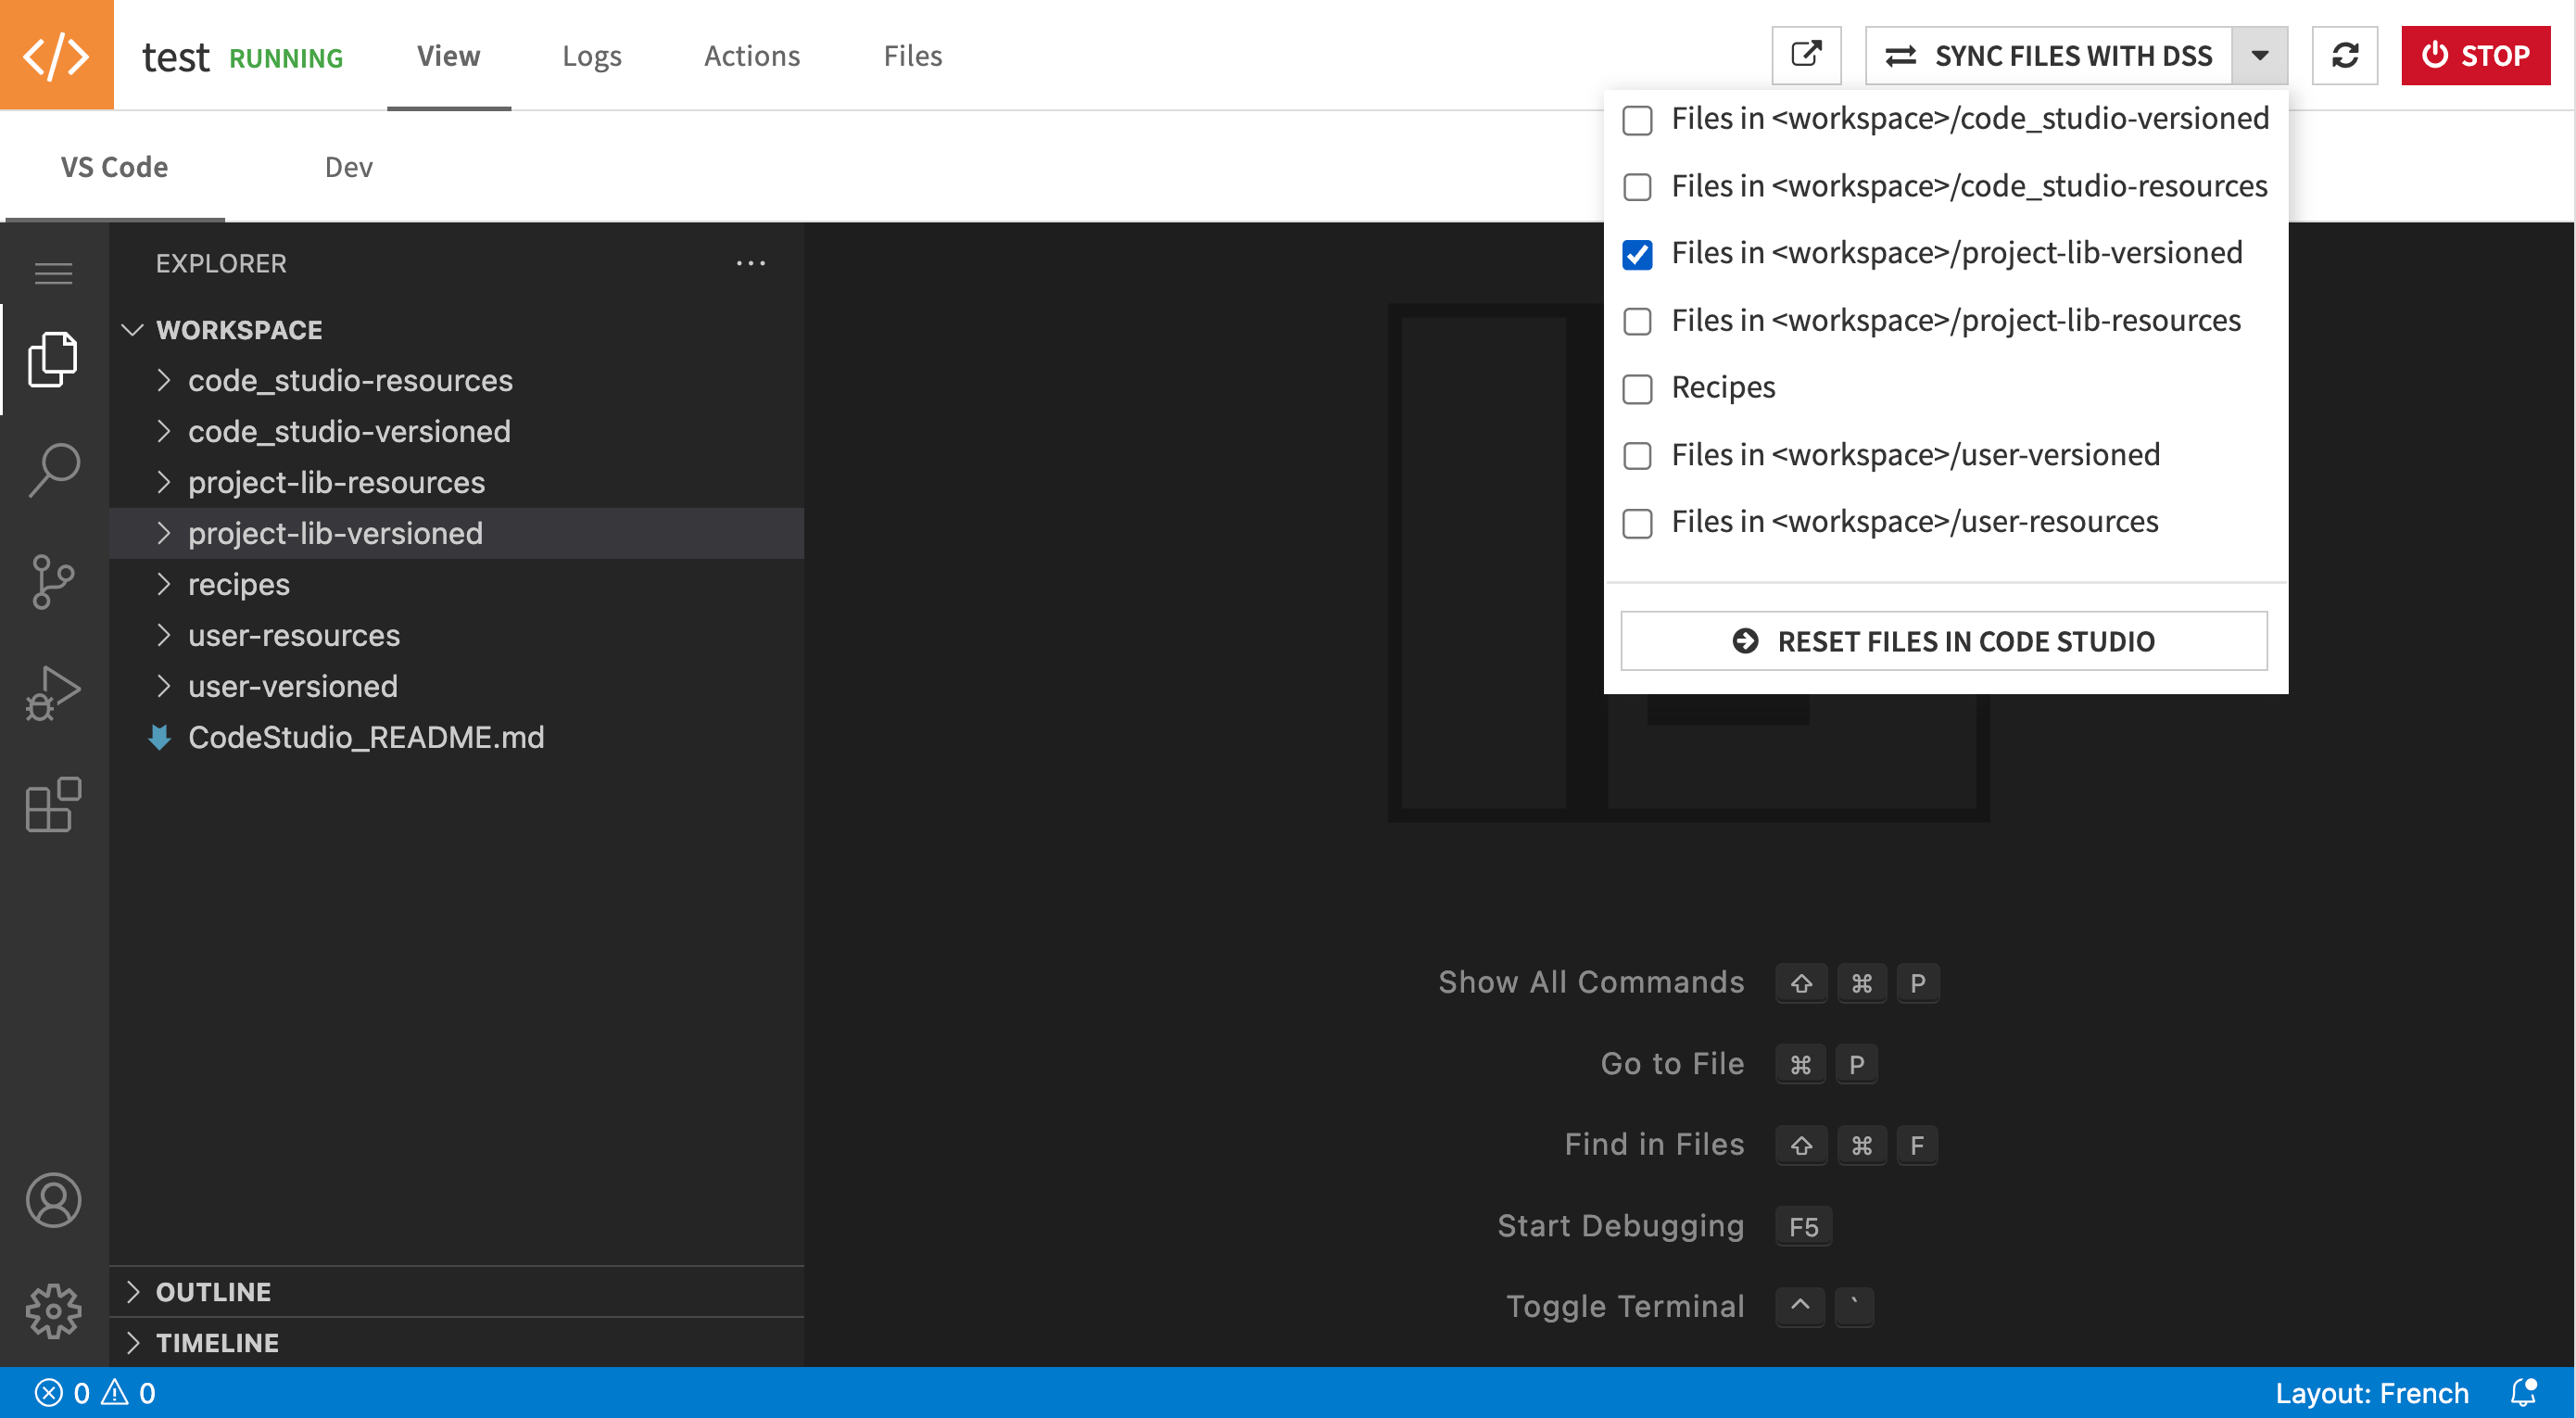
Step 2: Synchronize Files with the Dataiku instance#
To ensure that your web application files are accessible within the Dataiku environment, you’ll need to synchronize the contents of your
<workspace>/project-lib-versionedfolder with Dataiku.
Step 3: Include Webapps Folder in Project Python Path#
Incorporating the webapps folder into your project’s Python path enables the import of your custom Flask blueprints or FastAPI routers, and Python modules.
Edit the
external-libraries.jsonfile to includewebappsin the “pythonPath”:{ "gitReferences": {}, "pythonPath": [ "python", "webapps" ], "rsrcPath": [ "R" ], "importLibrariesFromProjects": [] }
This makes it possible to seamlessly integrate your custom Flask or FastAPI functionalities and Python modules into your Dataiku project. In the following, we will be using Flask with the WEBAIKU module.
Step 4: Initialize a New Standard Dataiku Web Application#
Navigate to </> -> Webapps through the top menu bar.
Click on + New Webapp button at the screen’s top right corner, then choose Code Webapp > Standard.
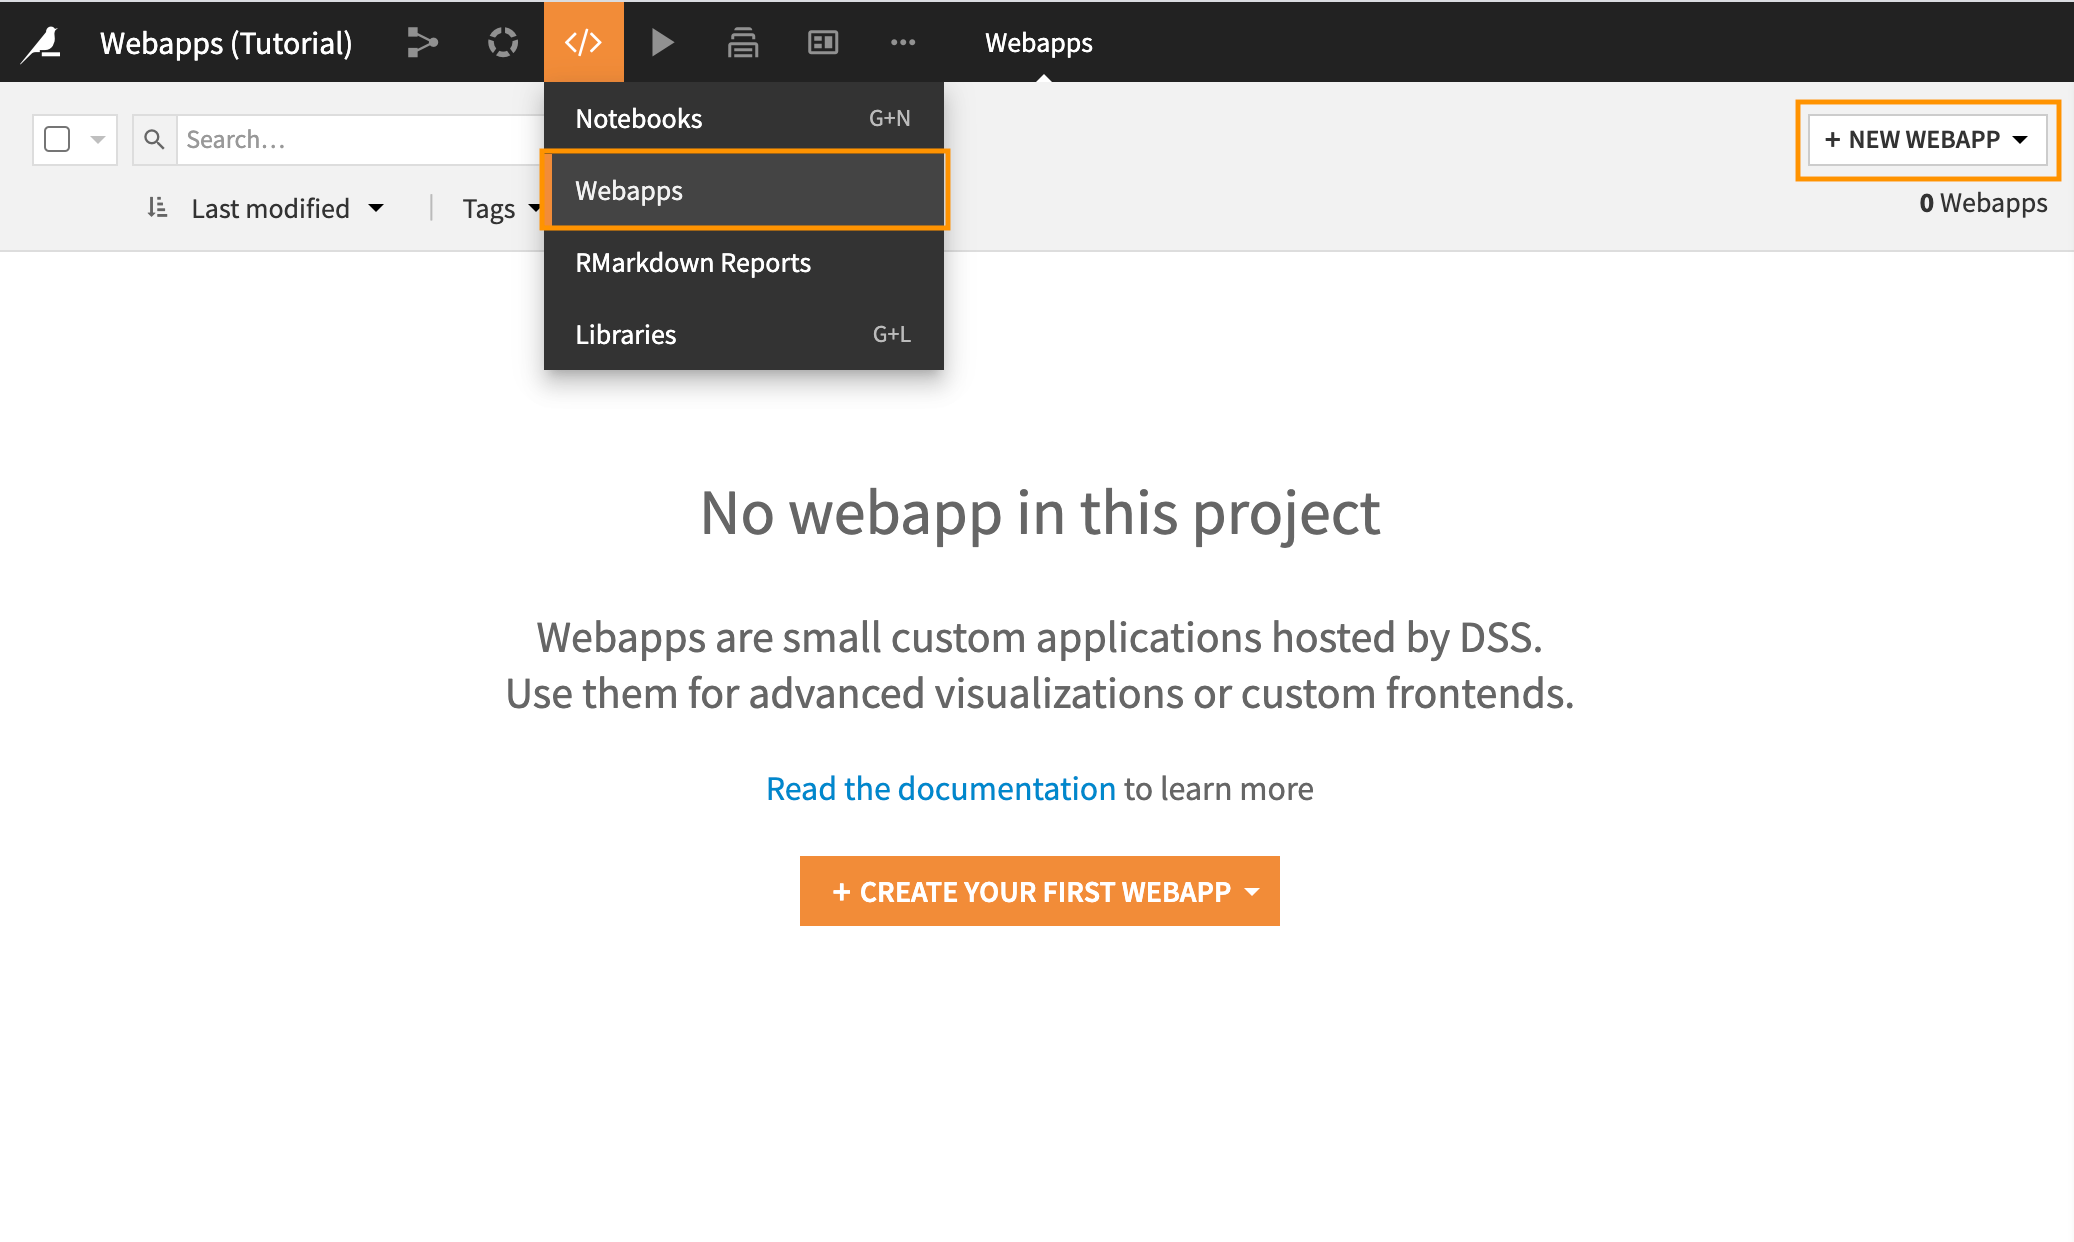
Clear out the default code in your web application’s CSS, HTML, JS, and Python tabs.
Step 5: Configuring the Python Backend#
Open the Settings panel in the web application you’ve just created. Here, select the appropriate code environment for your backend development.
Populate the Python backend tab of your standard web application with the following code snippet. Make sure to replace {__YOUR_WEBAPPLICATION_FOLDER__} with your actual web application folder name:
from flask import Flask
from webaiku.extension import WEBAIKU
from {__YOUR_WEBAPPLICATION_FOLDER__}.backend.fetch_api import fetch_api


WEBAIKU(app, "webapps/{__YOUR_WEBAPPLICATION_FOLDER__}/dist")
WEBAIKU.extend(app, [fetch_api])
Step 6: Initialize JavaScript#
In the JavaScript tab of your web application, paste the following code:
const backendURL = dataiku.getWebAppBackendUrl('fetch/bs_init?URL='+getWebAppBackendUrl(''));
window.onload = function() {
    var ifrm = document.createElement("iframe");
    ifrm.setAttribute("src", backendURL);
    ifrm.setAttribute("style", "position:fixed; top:0; left:0; bottom:0; right:0; width:100%; height:100%; border:none; margin:0; padding:0; overflow:hidden; z-index:999999;");
    document.body.appendChild(ifrm);
}
After inserting the provided Python and JavaScript code snippets, your web application is ready for viewing.
 This concludes the JavaScript initialization step, and you should now have a fully functioning web application developed using your preferred framework and deployed within Dataiku.
Next steps#
With your web application fully deployed, the next action you may take is to publish it on a Dataiku Dashboard.
Below are the complete versions of the code snippets used throughout this tutorial for easy reference:
JS Code
const backendURL = dataiku.getWebAppBackendUrl(
  "fetch/bs_init?URL=" + getWebAppBackendUrl("")
);
window.onload = function () {
  var ifrm = document.createElement("iframe");
  ifrm.setAttribute("src", backendURL);
  ifrm.setAttribute(
    "style",
    "position:fixed; top:0; left:0; bottom:0; right:0; width:100%; height:100%; border:none; margin:0; padding:0; overflow:hidden; z-index:999999;"
  );
  document.body.appendChild(ifrm);
};
Python Code
from flask import Flask
from webaiku.extension import WEBAIKU
from {__YOUR_WEBAPPLICATION_FOLDER__}.backend.fetch_api import fetch_api


WEBAIKU(app, "webapps/{__YOUR_WEBAPPLICATION_FOLDER__}/dist")
WEBAIKU.extend(app, [fetch_api])