Using JupyterLab in Code Studios#

This article covers the main features of JupyterLab in Code Studios. You can follow this tutorial if you have never set up Code Studio.

What can you edit with Code Studio and the Jupyterlab block?#

VSCode for Dataiku Code Studio enables you to edit the following items:

Item

Editable ?

Code recipes

Project libraries

Plugins

Notebooks

Webapps (standard)

Webapps (Bokeh)

Webapps (Shiny)

Webapps (Dash)

Webapps (Streamlit)

Webapps (Gradio)

Webapps (Voila)

Wiki

Prerequisites#

To use JupyterLab in Code Studios, you need a Dataiku 11+ instance with:

  • A working Code Studio instance with a JupyterLab block, a configured Kubernetes cluster, and an instance set up for Elastic AI computation created by an admin user. For details, visit JupyterLab in Code Studios.

Edit a Dataiku recipe#

JupyterLab in Code Studios allows you to edit your code recipe created in the Flow quickly and dynamically.

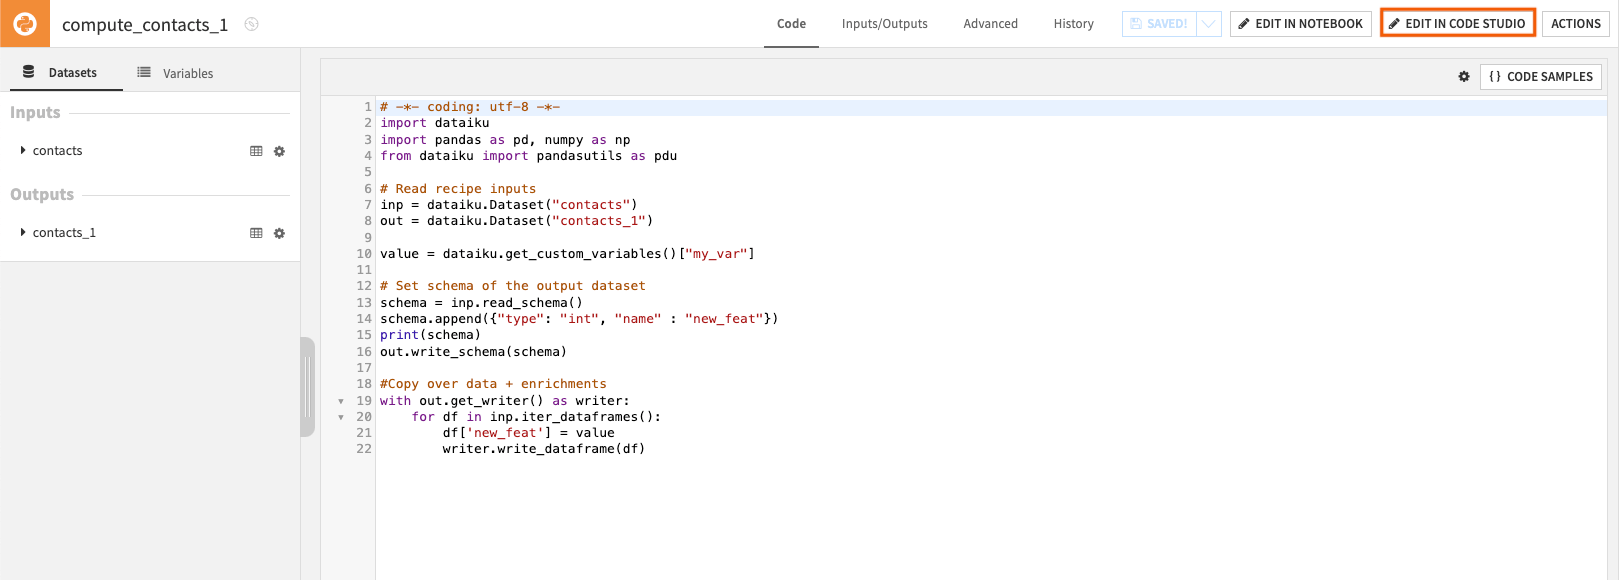
  1. From the Flow, open the code recipe you wish to edit.

  2. On the top-right corner, click on Edit in Code Studio and select your Code Studio instance.

Edit a recipe from the recipe page

You can also access your recipe directly from JupyterLab in Code Studios:

  1. From the left panel, navigate to the recipes folder.

  2. Click the recipe you want to edit to open it as a Python file in the center panel.

Note

You can execute your code in a Code Studio. However, to create a new recipe or build the output, you still have to do it from the Flow.
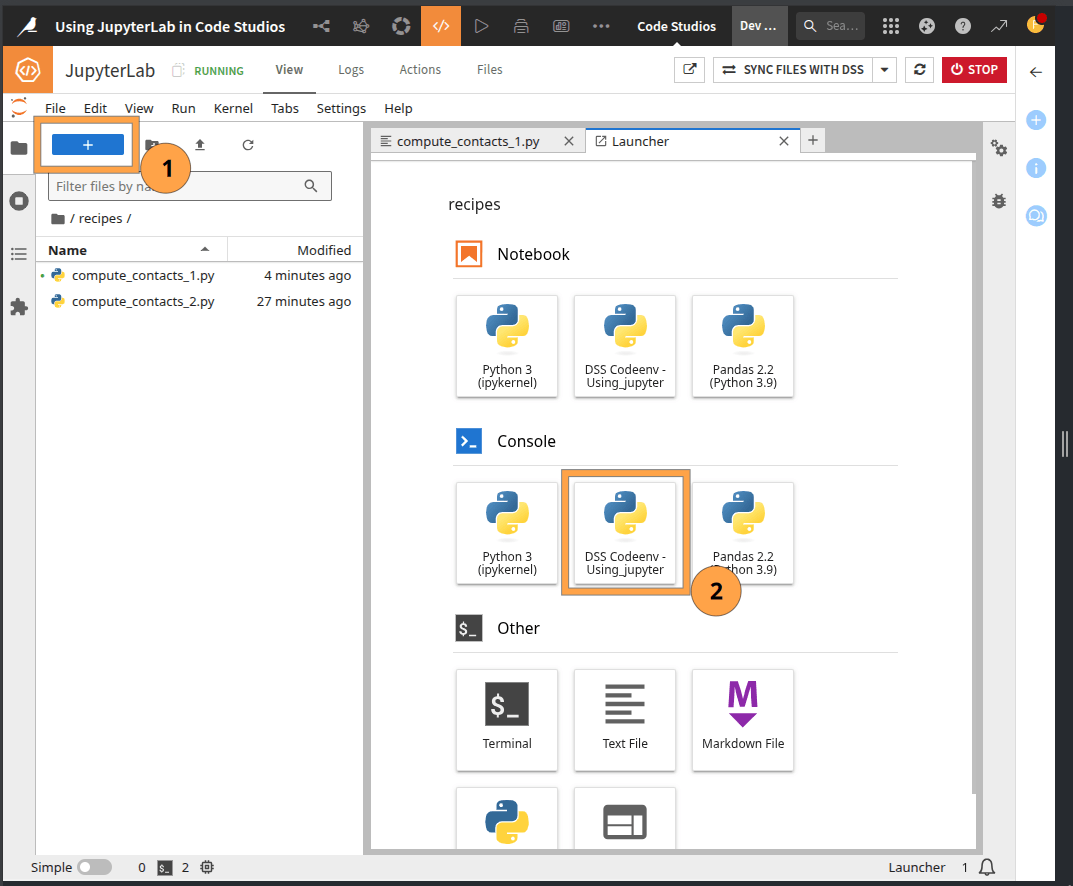
Debug a Dataiku recipe#

You can use JupyterLab debugging tools on a code recipe in a Code Studio, just as you would on local JupyterLab.

Debugger tool#

Several magic commands trigger a debugger to allow traceback when raising an exception.

To name a few, you can use:

  • %debug

  • %pdb

Debugging extension#

JupyterLab also supports some debugging extensions. One of them is the jupyterlab/debugger extension. To install it:

  1. Enter the command line jupyter labextension install @jupyterlab/debugger in a terminal.

  2. Access the debugger in the left panel.

Manage a Jupyter Notebook#

Edit a notebook#

Editing a notebook in a Code Studio is the same process as editing a recipe. To do so:

  1. Go to the Notebook page (G+N) and select a notebook to edit.

  2. In the top right corner, click Edit in Code Studio.

Alternatively, you can edit your notebook from your Code Studio instance. To do so:

  1. From the left panel, navigate to the notebook folder.

  2. Select the notebook you want to open.

Create and retrieve a notebook#

Unlike the recipe, you can create a new notebook directly from a Code Studio:

  1. Click File > New > Notebook and select the type of notebook you want to create.

  2. Click Sync files with DSS to save it to DSS.

  3. Go to the Notebook page (G+N) to access your new notebook.

Code environment from scratch#

Import and install your code environment#

Code Studios can be seen as a place of experimentation where you can try out a different environment to test which package best suits your code.

In JupyterLab, there are different ways to install various packages.

You can do it in a Jupyter Notebook (or a Python console):

  1. In the top tools bar, click on File > New > Notebook.

  2. In the first cell, install the wanted package with a package manager such as pip with the command:

    !pip install <package>    
    

Caution

Note that the installed packages are not persistent when the Code Studio instance is restarted.

You can also do it in a terminal:

  1. In the top tools bar, click on File > New > Terminal.

  2. In the command line, enter pip install <package>

If you already have your code environment with plenty of packages ready to be used, it is possible to install them quickly. To do so:

  1. In the Libraries menu (G+L), in the left panel, navigate to the python/my_package folder and click on the More options icon.

  2. Click on Upload file….

    Uploading the requirements txt file

  3. Drag your requirements.txt file in the dedicated area and click Upload to confirm.

  4. Click on the Code page </> in the top navigation bar and return to your Code Studio instance.

  5. In the terminal, enter the command line pip install -r workspace/project-lib-versioned/python/my_package/requirements.txt

Note

Note that the project-lib-versioned folder stores the different libraries in a Code Studio. It refers to the lib folder in the Libraries menu.

Alternatively, you can also install these libraries through a notebook or a console.

Caution

Mind where you create the notebook or the console in the directory, as the Path to the requirements.txt file may change according to it. Note that you don’t have this issue with a terminal.

Export your code environment#

Once your tests are appealing, exporting the new code environment from your Code Studio is possible. To do so:

  1. In the top tools bar, click on File > New > Terminal.

  2. Enter the command line pip freeze > workspace/project-lib-versioned/python/my_package/new_requirements.txt

  3. On the top-right corner, click on Sync files with DSS to save the change and retrieve your code environment file in the Libraries menu.

Provided code environment from a template#

Exploration of the code environment#

If the Code Studio instance has been installed with a template providing a code environment block, you should be able to explore it. To do so:

  1. From the Launcher page of JupyterLab, under Notebook, click on the code environment provided to open a notebook. You can also open a Python console just below.

    Provided code env from dataiku

  2. In the first cell of the notebook, enter the magic command %pip list to list all the installed packages.

Edit the provided code environment#

From the notebook or the console of the code environment provided, you can update the code env. To do so:

  1. Enter %pip install <package> in the code cell and run it.

  2. You can check that the result of %pip list has been changed, including the newly installed package.

Caution

For this to persist in the instance, several other steps are required on the admin side.

Using Code Studio to edit code in a Git reference#

If you have imported code from Git in Libraries, you will be able to edit this code within a Code Studio. You can commit the changes made in a Code Studio to the Git reference:

  1. Edit the files in project-lib-versioned your Code Studio instance and click Sync files with DSS.

  2. Go back to DSS Project Libraries, click Commit and push all….

Wrapping up#

Congratulations, you should now have a functional setup to leverage JupyterLab in Code Studios to edit your code in Dataiku as if you were working with your local JupyterLab!