

Using Databricks Connect Python in Dataiku: basics#
This tutorial provides a comprehensive guide to using Databricks Connect with Python in Dataiku, from the initial setup to data manipulation with Pyspark DataFrames. By following this tutorial, users will be equipped to leverage Databricks’ computational resources effectively, directly from Dataiku.
Prerequisites#
Dataiku >= 12.1.0
A Databricks cluster with a runtime in version at least 13.0
A Databricks connection with Datasets containing:
the NYC Taxi trip data over the year/month of your choice, referred to as
NYC_tripsthe NYC Taxi zone lookup table referred to as
NYC_zones.an extract from the IMDB movie review dataset referred to as
IMDB_train.
A Python 3.10 code environment with the following packages installed:
databricks-connect==13.0.*spacy==3.6.0The code environment should also have the following initialization script:
from dataiku.code_env_resources import clear_all_env_vars
clear_all_env_vars()
import spacy
spacy.cli.download("en_core_web_sm")
What is Databricks Connect?#
Databricks Connect is a package to run Pyspark code on a Databricks cluster from any machine, by connecting remotely to the Databricks cluster and accessing its computational resources.
Creating a Session#
As usual with Pyspark, all commands will ultimately be issued to a Spark session, either via methods directly on the session object, or via Spark DataFrames, which will translate and propagate commands to the session object they’re referencing.
Normally, this Session would need to be instantiated with the user manually providing credentials such as the personal access token, and connection details such as the workspace and cluster id. However, the get_session() method reads all the necessary parameters from the Databricks connection in Dataiku and thus exempts the user from having to handle credentials manually.
Start by creating a Jupyter notebook with the code environment mentioned in the prerequisites and instantiate your Session object:
from dataiku.dbconnect import DkuDBConnect

dbc = DkuDBConnect()
# Replace with the name of your Databricks connection
session = dbc.get_session(connection_name="YOUR-CONNECTION-NAME")
Loading data into a DataFrame#
Before working with the data, you first need to read it, more precisely to get a Pyspark DataFrame pointing at the Databricks table. With your session variable, create a Pyspark DataFrame using one of the following ways:
Option 1: with the Dataiku API#
The easiest way to retrieve a DataFrame is by using the get_dataframe() method and passing a dataiku.Dataset object. The get_dataframe() can optionally be given a Databricks Connect Session argument. Dataiku will use the session created above or create a new one if no argument is passed.
import dataiku
NYC_trips = dataiku.Dataset("NYC_trips")
df_trips = dbc.get_dataframe(dataset=NYC_trips)
Option 2: with a SQL query#
Using the session object, a DataFrame can be created from a SQL query.
# Retrieve useful metadata from the Dataset object:
NYC_trips_info = NYC_trips.get_location_info().get('info', {})
# Get the name of the dataiku.Dataset's underlying Databricks table:
trips_table_name = NYC_trips_info.get('table')
# Get the table's schema and catalog names:
trips_table_schema = NYC_trips_info.get('schema')
trips_table_catalog = NYC_trips_info.get('catalog')
# Combine all this information to create the DataFrame via SQL:
df_trips = session.sql(f"select * from {trips_table_catalog}.{trips_table_schema}.{trips_table_name}")
Unlike Pandas DataFrames, Pyspark DataFrames are lazily evaluated. This means that they, and any subsequent operation applied to them, are not immediately executed.
Instead, they are recorded in a Directed Acyclic Graph (DAG) that is evaluated only upon the calling of certain methods (collect(), take(), show(), toPandas()) or when writing out the dataframe produced by the chain of operations (write.saveAsTable()).
This lazy evaluation minimizes traffic between the Databricks cluster and the client as well as client-side memory usage.
Retrieving rows#
The
take(n)method is a method that allows users to pull and check n rows from the Pyspark DataFrame. Yet, it is arguably not the most pleasant way of checking a DataFrame’s content.
# Retrieve 5 rows
df_trips.take(5)

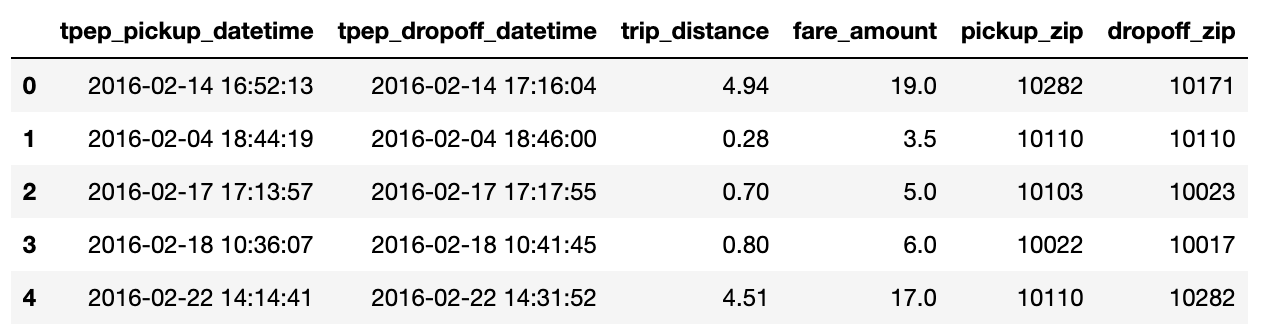
The
toPandas()method converts the Pyspark DataFrame into a more aesthetically-pleasing Pandas DataFrame. Avoid using this method if the data is too large to fit in memory. Alternatively, you can use a limit statement before retrieving the results as a Pandas DataFrame.
df_trips.limit(5).toPandas()
Common operations#
The following paragraphs illustrate a few examples of basic data manipulation using DataFrames:
Selecting column(s)#
Databricks is case-insensitive w.r.t. identifiers (column names, table names, …). Using the select method returns a DataFrame:
from pyspark.sql.functions import col

fare_amount = df_trips.select([col('fare_amount'),col('tip_amount')])

# Shorter equivalent version:
fare_amount = df_trips.select(['fare_amount','tip_amount'])
Computing the average of a column#
Collect the mean fare_amount. This returns a 1-element list of type snowflake.snowpark.row.Row:
from pyspark.sql.functions import mean

avg_row = df_trips.select(mean(col('fare_amount'))).collect()
avg_row
You can access the value as follows:
avg = avg_row[0].asDict().get('avg(fare_amount)')
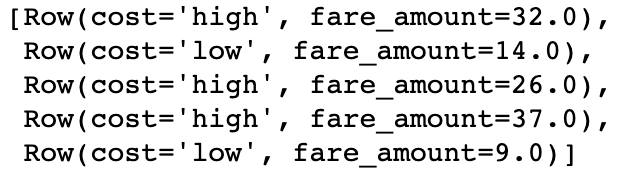
Creating a new column from a case expression#
Leverage the withColumn() method to create a new column indicating whether a trip’s fare was above average. That new column is the result of a case expression (when() and otherwise()):
from pyspark.sql.functions import when

df_trips = df_trips.withColumn('cost', when(col('fare_amount') > avg, "high")\
       .otherwise("low"))

# Check the first five rows
df_trips.select(['cost', 'fare_amount']).take(5)
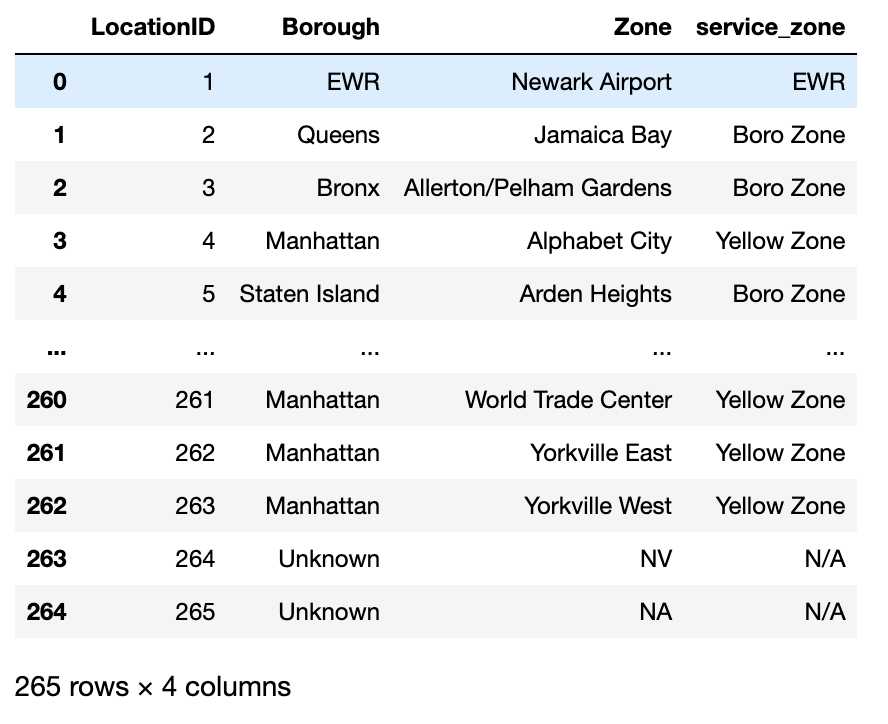
Joining two tables#
The NYC_trips contains a pick up and drop off location id (PULocationID and DOLocationID). We can map those location ids to their corresponding zone names using the NYC_zones Dataset.
To do so, perform two consecutive joins on the OBJECTID column in the NYC zone Dataset.
# Get the NYC_zones Dataset object
NYC_zones = dataiku.Dataset("NYC_zones")
df_zones = dbc.get_dataframe(NYC_zones)

df_zones.toPandas()
Finally, perform the two consecutive left joins. Note how you are able to chain different operations including withColumnRenamed() to rename the zone column and drop() to remove other columns from the NYC_zones Dataset:
df = df_trips.join(df_zones, col('PULocationID')==col('LocationID'))\
        .withColumnRenamed('zone', 'pickup_zone')\
        .drop('LocationID', 'PULocationID', 'borough', 'service_zone')\
        .join(df_zones, col('DOLocationID')==col('LocationID'))\
        .withColumnRenamed('zone', 'dropoff_zone')\
        .drop('LocationID', 'DOLocationID', 'borough', 'service_zone')
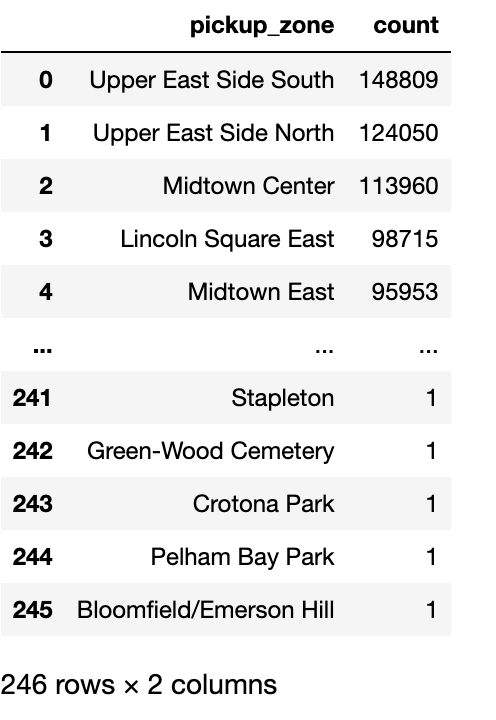
Group By#
Count the number of trips by pickup zone among expensive trips. Use the filter() method to remove cheaper trips. Then use the groupBy() method to group by pickup_zone, count() the number of trips and sort() them by descending order. Finally, call the toPandas() method to store the results of the group by as a Pandas DataFrame.
results_count_df = df.filter((col('cost')=="low"))\
  .groupBy(col('pickup_zone'))\
  .count()\
  .sort(col('count'), ascending=False)\
  .toPandas()

results_count_df
User Defined Functions (UDF)#
Databricks Connect can use UDFs like regular Pyspark.
A User Defined Functions (UDF) is a function that, for a single row, takes the values of one or several cells from that row, and returns a new value.
UDFs effectively allow users to transform data using custom complex logic beyond what’s possible in pure SQL. This includes the use of any Python packages.
To be used, UDFs first need to be registered so that at execution time they can be properly sent to the Snowflake servers. In this section, you will see a simple UDF example and how to register it.
Registering a UDF#
The first option to register a UDF is to use either the
register()or theudf()function. In the following code block is a simple UDF example that computes the tip percentage over the taxi ride total fare amount:
from pyspark.sql.functions import udf
from pyspark.sql.types import FloatType

def get_tip_pct(tip_amount, fare_amount):
    return tip_amount/fare_amount

# Register with register()
get_tip_pct_udf = session.udf.register('get_tip_pct_udf', get_tip_pct, FloatType())

# Register with udf()
get_tip_pct_udf = udf(get_tip_pct, FloatType())
An alternative way of registering the
get_tip_pct()function as a UDF is to decorate your function with@udf. If you choose this way, you will need to specify the input and output types directly in the Python function.
@udf(returnType=FloatType())
def get_tip_pct(tip_amount:float, fare_amount:float) -> float:
    return tip_amount/fare_amount
Applying a UDF#
Now that the UDF is registered, you can use it to generate new columns in your DataFrame using withColumn():
df = df.withColumn('tip_pct', get_tip_pct_udf(col('tip_amount'), col('fare_amount') ))
After running this code, you should be able to see that the tip_pct column was created in the df DataFrame.
Advanced UDFs#
UDfs can be simple Python code, not relying on any external package, or on base Python packages, but the real value comes from using complex packages. In the end, this is akin to using Spark as a resilient parallelization engine.
We’ll make an example by running Spacy part-of-speech abilities on the IMBD reviews dataset.
Package setup#
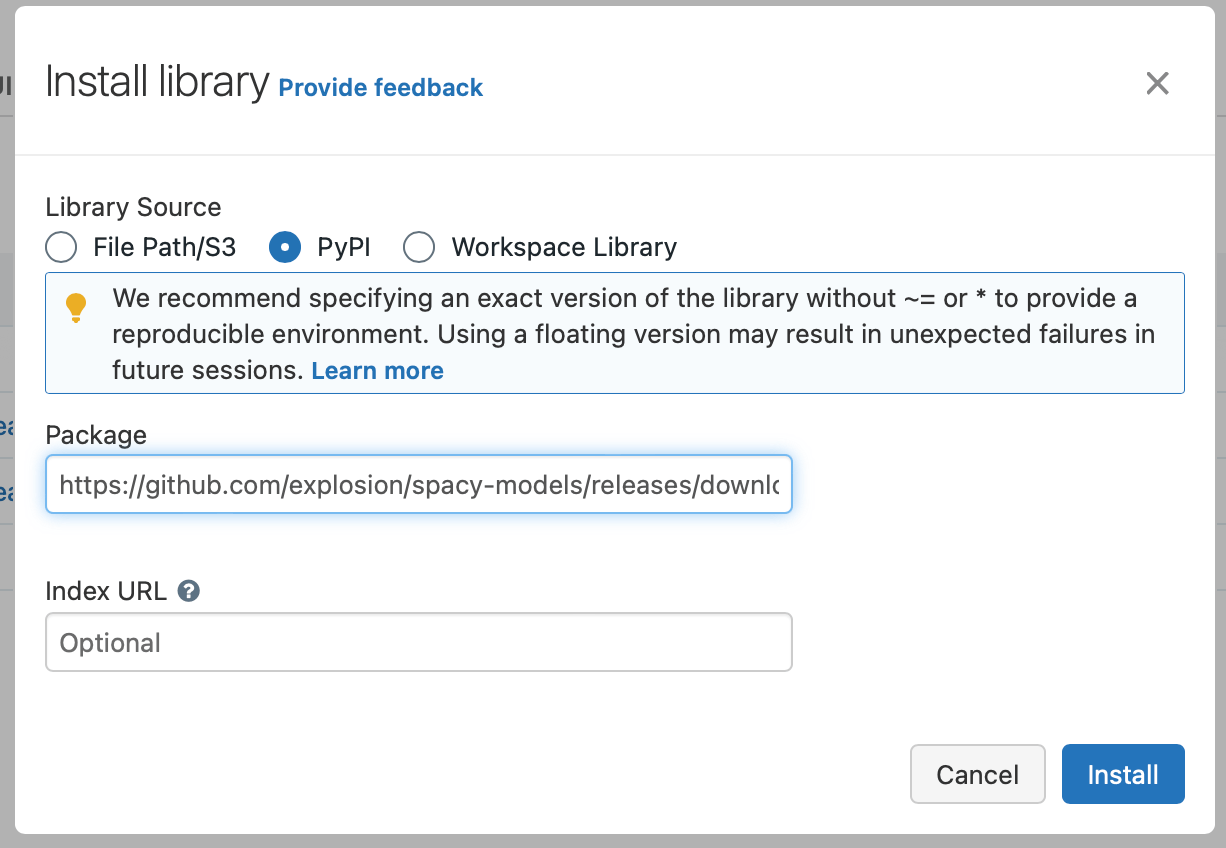
Using special packages comes with a price, though, in that packages must be installed in the Databricks cluster nodes. To that effect, use the Libraries of your cluster to install libraries, each one a Pypi package:
spacy==3.6.0https://github.com/explosion/spacy-models/releases/download/en_core_web_sm-3.6.0/en_core_web_sm-3.6.0.tar.gz
On the Dataiku side, if you have properly fulfilled the tutorial prerequisites then you should be all set.
Define UDF with imports#
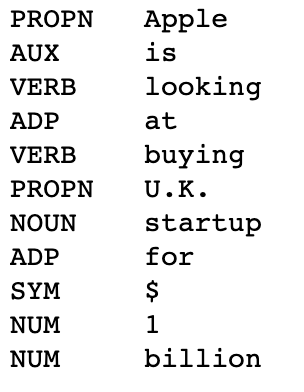
Sincespacy is installed in the code environment, you can run in the notebook the example from Spacy’s tutorial:
import spacy

nlp = spacy.load("en_core_web_sm")
for token in nlp("Apple is looking at buying U.K. startup for $1 billion"):
    print("%s\t%s" % (token.pos_, token.text))
We can use some UDF magic to apply this to each row of a Pyspark Dataframe, but there’s a catch: the spacy.load() function shouldn’t be called for each row processed, as it’s too slow, nor can the nlp object (the Spacy model handle) be created outside the UDF’s body and copied to the Databricks cluster. This implies using a global variable to store the model on the cluster-side.
import spacy, json
from pyspark.sql.types import StringType
NLP = None
@udf(returnType=StringType())
def part_of_speech(input_text):
    global NLP
    if NLP is None:
        NLP = spacy.load("en_core_web_sm")
    poses = [token.pos_ for token in NLP(input_text)]
    return json.dumps(poses)
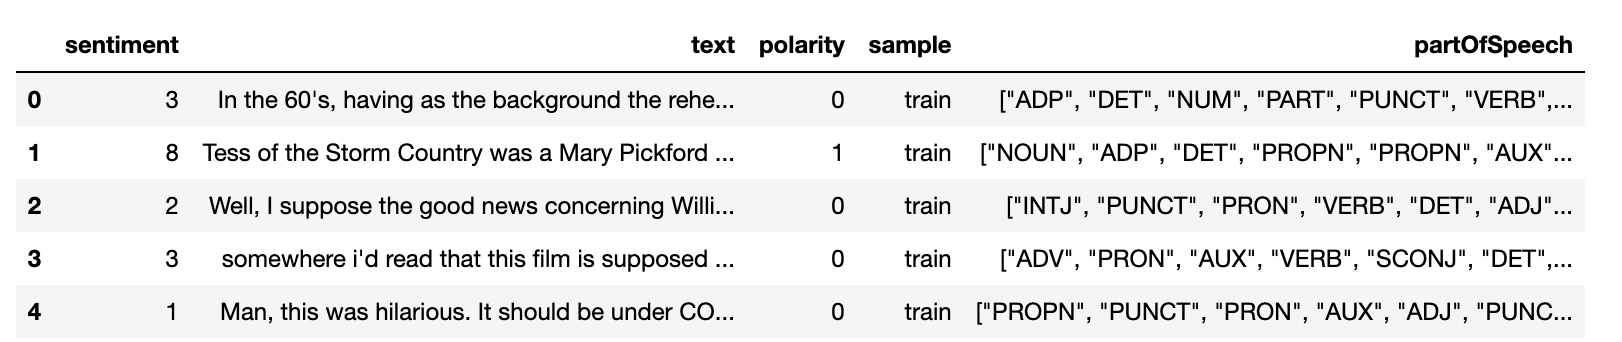
This can then be applied to our IMDB reviews dataset.
df_imdb = dbc.get_dataframe(dataiku.Dataset("IMDB_train"))
df_imdb = df_imdb.withColumn("partOfSpeech", part_of_speech(col('text')))
df_imdb.limit(5).toPandas()
Writing a DataFrame into a Databricks Dataset#
In a Python recipe, you will likely want to write a Pyspark DataFrame into a Databricks output dataset. We recommend using the write_with_schema() method of the DkuDBConnect class. This method runs the saveAsTable() Pyspark method to save the contents of a DataFrame into a Databricks table.
ouput_dataset = dataiku.Dataset("my_output_dataset")
dbc.write_with_schema(ouput_dataset, df)
Warning
You should avoid converting a Pyspark DataFrame to a Pandas DataFrame before writing the output Dataset. In the following example, using the toPandas() method will create the Pandas DataFrame locally, further increasing memory usage and potentially leading to resource shortage issues.
ouput_dataset = dataiku.Dataset("my_output_dataset")
# Load the ENTIRE DataFrame in memory (NOT optimal !!)
ouput_dataset.write_with_schema(df.toPandas())
Wrapping up#
Congratulations, you now know how to work with Databricks Connect within Dataiku! To go further, here are some useful links: