

Creating and configuring a plugin#
This tutorial explains how to create and configure a plugin and why you should use a separate instance for plugin development.
Prerequisites#
The minimal prerequisites are:
“Manage all code-envs” permission.
“Develop plugins” permission.
Dataiku.
It would be best to have:
A dedicated Dataiku instance with admin rights (you can rely on the community Dataiku instance).
Attention
We highly recommend a separate, dedicated instance for plugin development. That way, you can test and develop the plugin without affecting Dataiku projects or jeopardizing other users’ experience. Attentive readers should read this introduction first (Foreword).
Plugin creation#
Although creating a plugin outside Dataiku is possible, we recommend not doing it this way. It would be best if you let Dataiku complete the first initialization. To do this, Go to the plugin page, click the “ADD PLUGIN” button, and choose the “Write your own” option, as shown in Fig. 1.
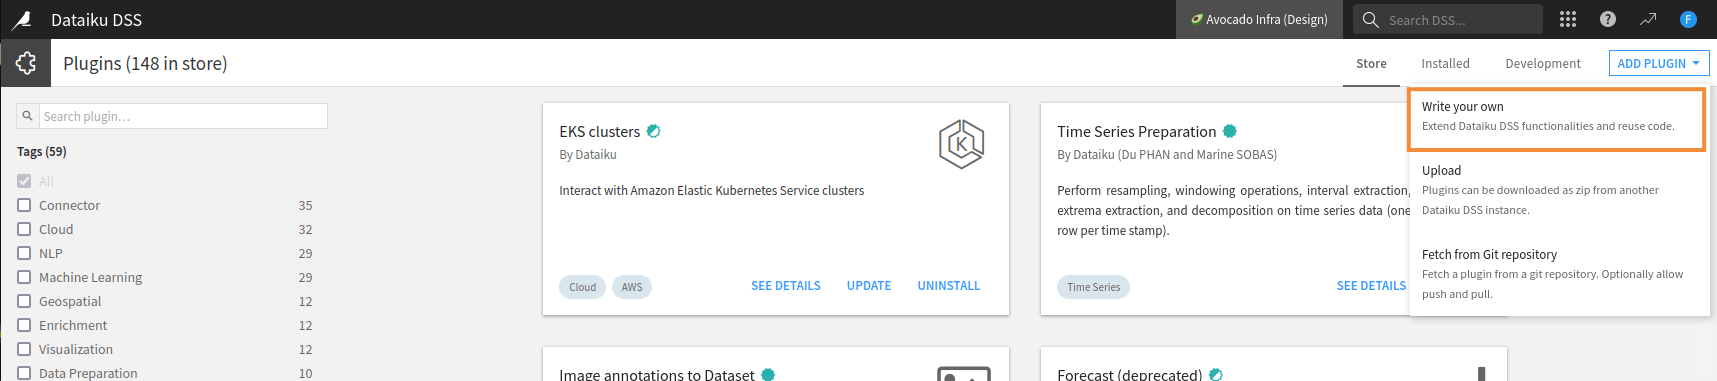
Figure 1: Plugin creation – first step.#
This will create the correct directory structure and let you choose/create the code environment your plugin will use once you have chosen a valid name for your plugin. You can select any name you want, but we recommend following these rules:
The plugin names must be in lowercase; the UI enforces this.
The words must be separated by a -.
The word order must be valid in English.
The plugin name must not contain “plugin” or “custom”. As you are developing a plugin, it is evident that this is a plugin for custom actions.
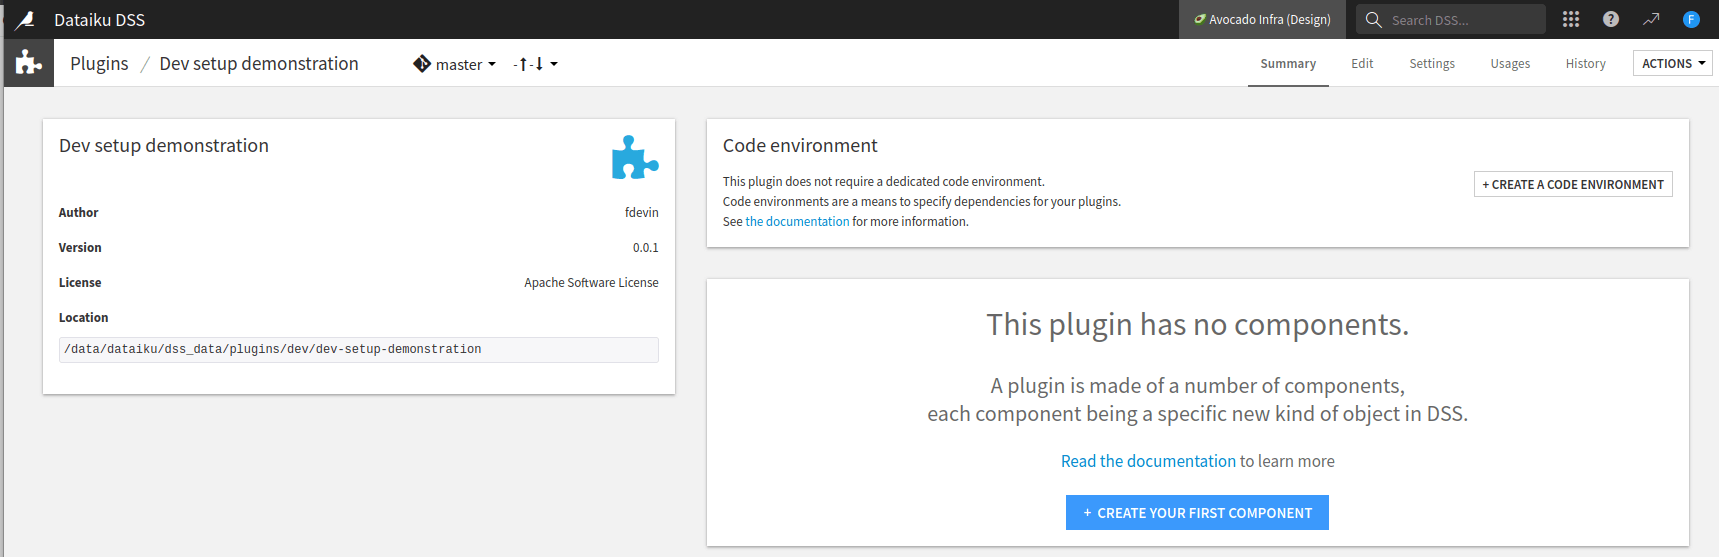
Figure 2: Plugin creation screen.#
Plugin configuration#
You will land on the screen shown in Fig. 2.
If your plugin requires a specific code environment, click the + Create a code environment button.
Adapt the desc.json file to your needs, and if you need particular packages,
fill in the requirements.txt file,
as shown in Fig. 3.
Then, in the Summary panel, click the Build new environment button.
n
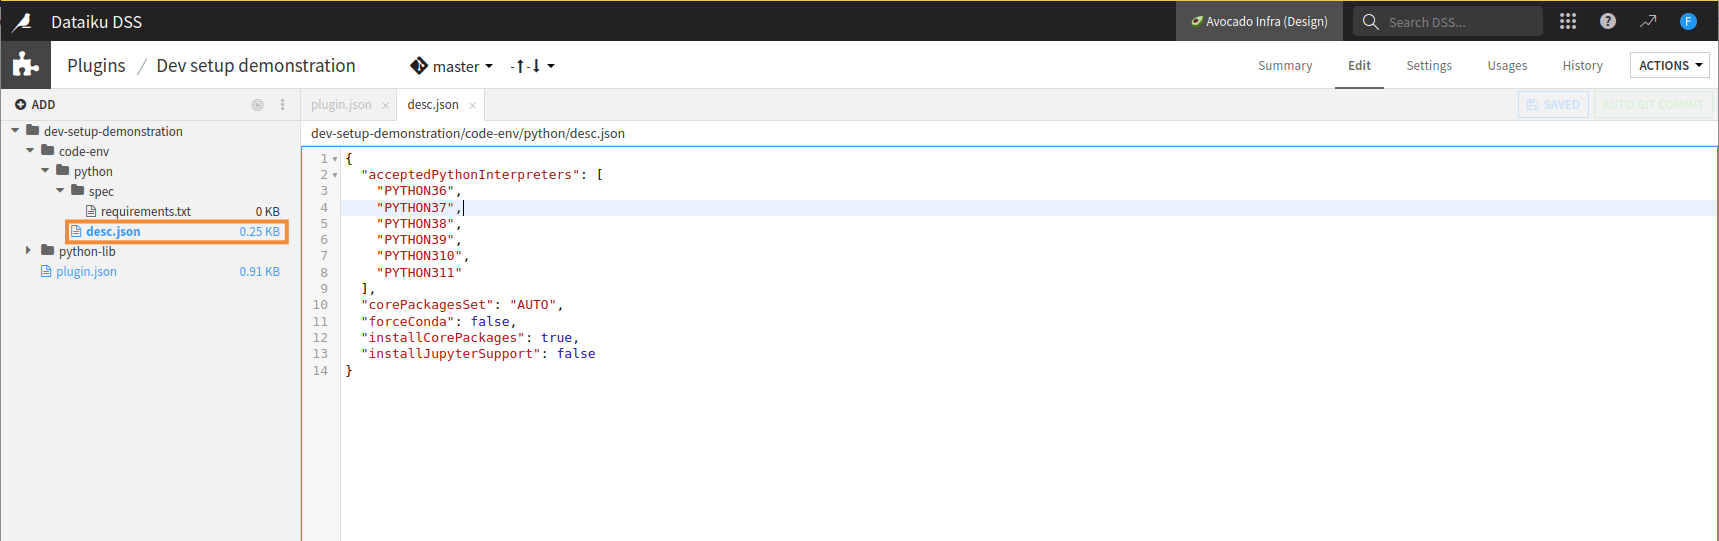
Figure 3: Dedicated code environment creation for plugin development.#
Plugin documentation#
plugin.json configuration file.#{
// Plugin identifiers are globally unique and only contain A-Za-z0-9_-
"id": "dev-setup-demonstration",
// It is highly recommended to use Semantic Versioning
"version": "0.0.1",
// Meta data for display purposes:
"meta": {
// label: name of the plugin as displayed, should be short
"label": "Dev setup demonstration",
// description: longer string to help end users understand what this plugin does
"description": "",
"author": "fdevin",
// icon: must be one of the FontAwesome 3.2.1 icons, complete list here at https://fontawesome.com/v3.2.1/icons/
"icon": "icon-puzzle-piece",
// recipesCategory: optional, can be one of 'visual', 'code', 'genai' or 'other'
// defines the category of the plugin in the right panel
"recipesCategory": "",
// List of tags for filtering the list of plugins
"tags": [], //for example: ["Machine Learning", "NLP"]
// URL where the user can learn more about the plugin
"url": "",
"licenseInfo": "Apache Software License"
}
}
The file plugin.json, shown in Code 1,
is the configuration file for the plugin.
You should not change the "id" field and use semantic versioning for the "version" field.
The "meta" object is made of:
"label"is used when Dataiku displays the plugin’s name. As a plugin can contain many components, the label should not be specific to a particular function but on a global naming representing the plugin."description"is a longer text used by Dataiku when the UI has to display more information than only the plugin’s name."author"is the name of the plugin’s author."icon"is an icon representing your plugin."recipesCategory"defines the category of plugin recipe components in the right panel. Allowed values arevisual,code,genaiorother. If left empty recipes will simply appear in the “Plugin recipes” category."tags"is a list of tags that help filter when searching for a plugin."url"is a link to the plugin’s documentation."licenseInfo"is the license associated to your plugin.
For example, the Fig. 4 is obtained by using the Code 2.
plugin.json configuration file.#{
"id": "dev-setup-demonstration",
"version": "0.0.1",
"meta": {
"label": "Developer advocacy -- Plugin",
"description": "This plugin aims to demonstrate how to set up a developer environment. It also shows some simple configuration possibilities.",
"author": "Dataiku developer advocay team",
"icon": "icon-lemon",
"recipesCategory": "visual",
"tags": ["Developer", "devadvocacy team", "tutorials", "Dev enviroment"], //for example: ["Machine Learning", "NLP"]
"url": "http://developer.dataiku.com/",
"licenseInfo": "Apache Software License"
}
}
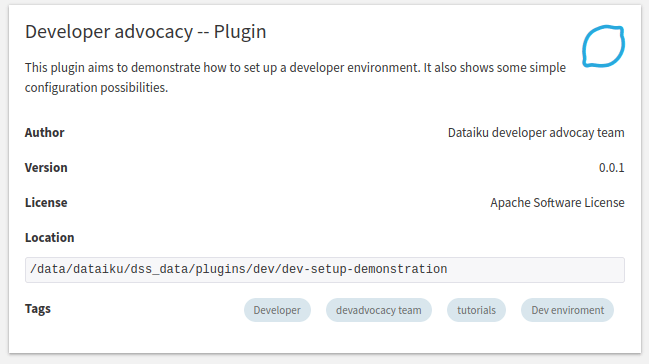
Figure 4: Configuring the plugin.#