Basic setup: Code studio template#
This section walks you through the setup process of a Code Studio template specifically designed for web application development using leading frontend frameworks. Currently, we support Vue and Angular.
In the next sections, you’ll find two methods to set up your Code Studio template. You can choose the one that suits your needs best:
If you prefer a quick and straightforward setup, follow the Importing the template into Dataiku steps below.
For a more detailed and manual configuration, you can opt for the Manual setup instructions provided afterward.
Prerequisites#
Before you begin, ensure you meet the following requirements:
Container based image: Almalinux
Knowledge of Dataiku Code Studios.
Admin permissions to configure Code Studio templates.
Python 3.9+ with Cookiecutter 2.3.1+ installed.
For Flask backend, Python 3.9+ and the following packages:
Flask>=0.9
git+https://github.com/dataiku/solutions-contrib.git@main#egg=webaiku&subdirectory=bs-infra
python-dotenv>=0.19.0
dataiku-api-client
Importing the template into Dataiku#
Follow these steps to import the template:
Download the Code Studio template.
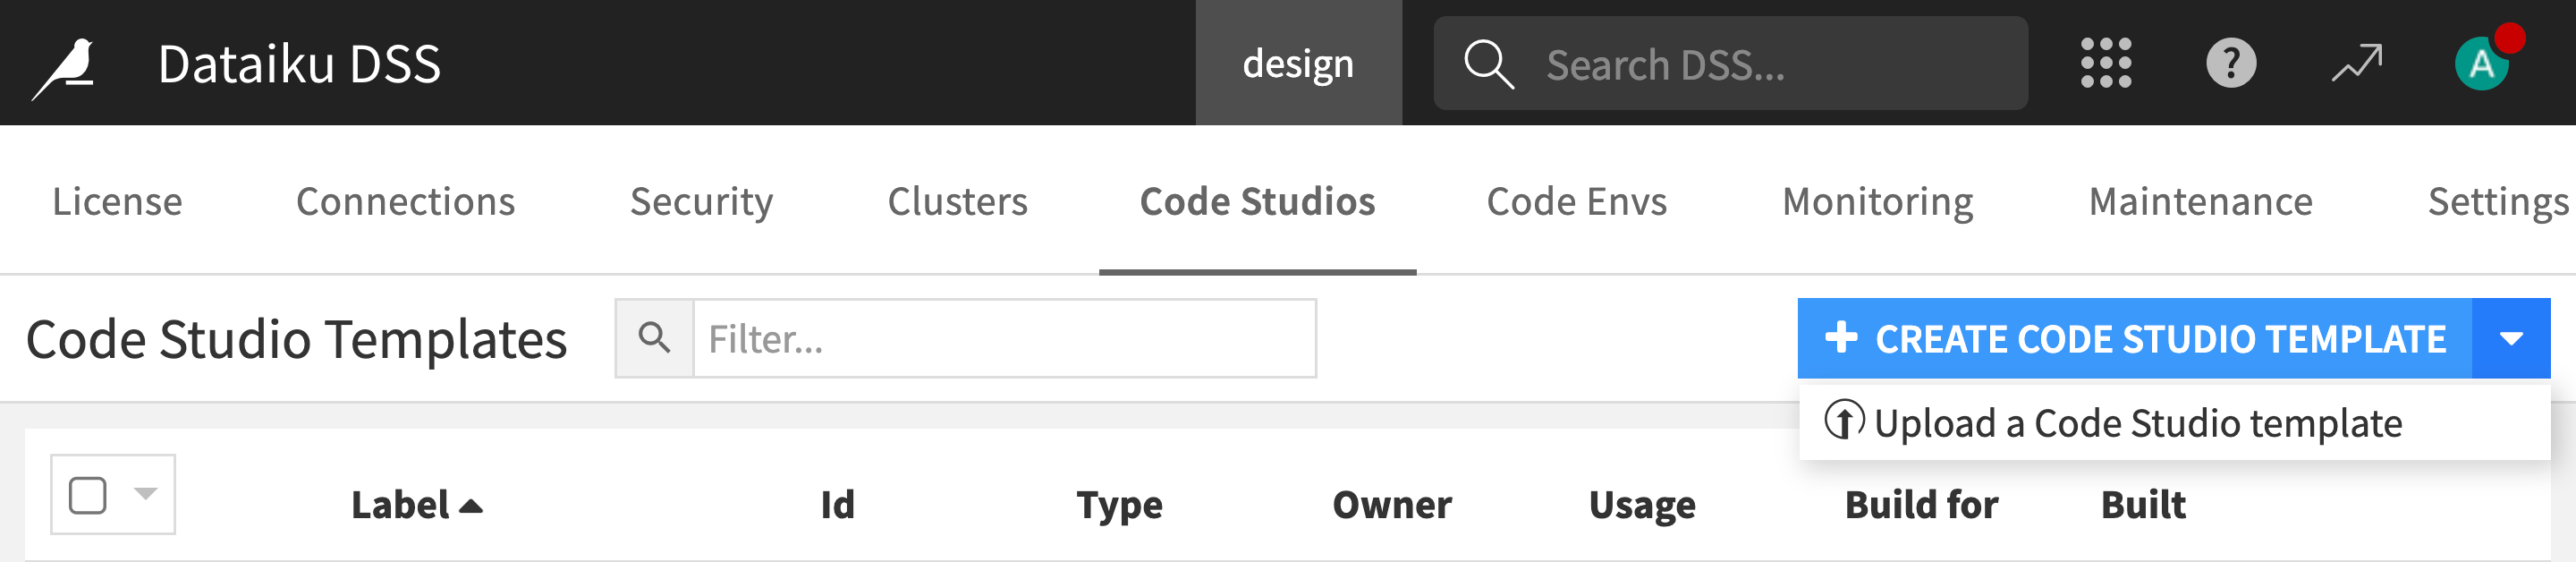
In the Application menu, under Administration, navigate to the Code Studios panel and select the Upload a Code Studio Template option.
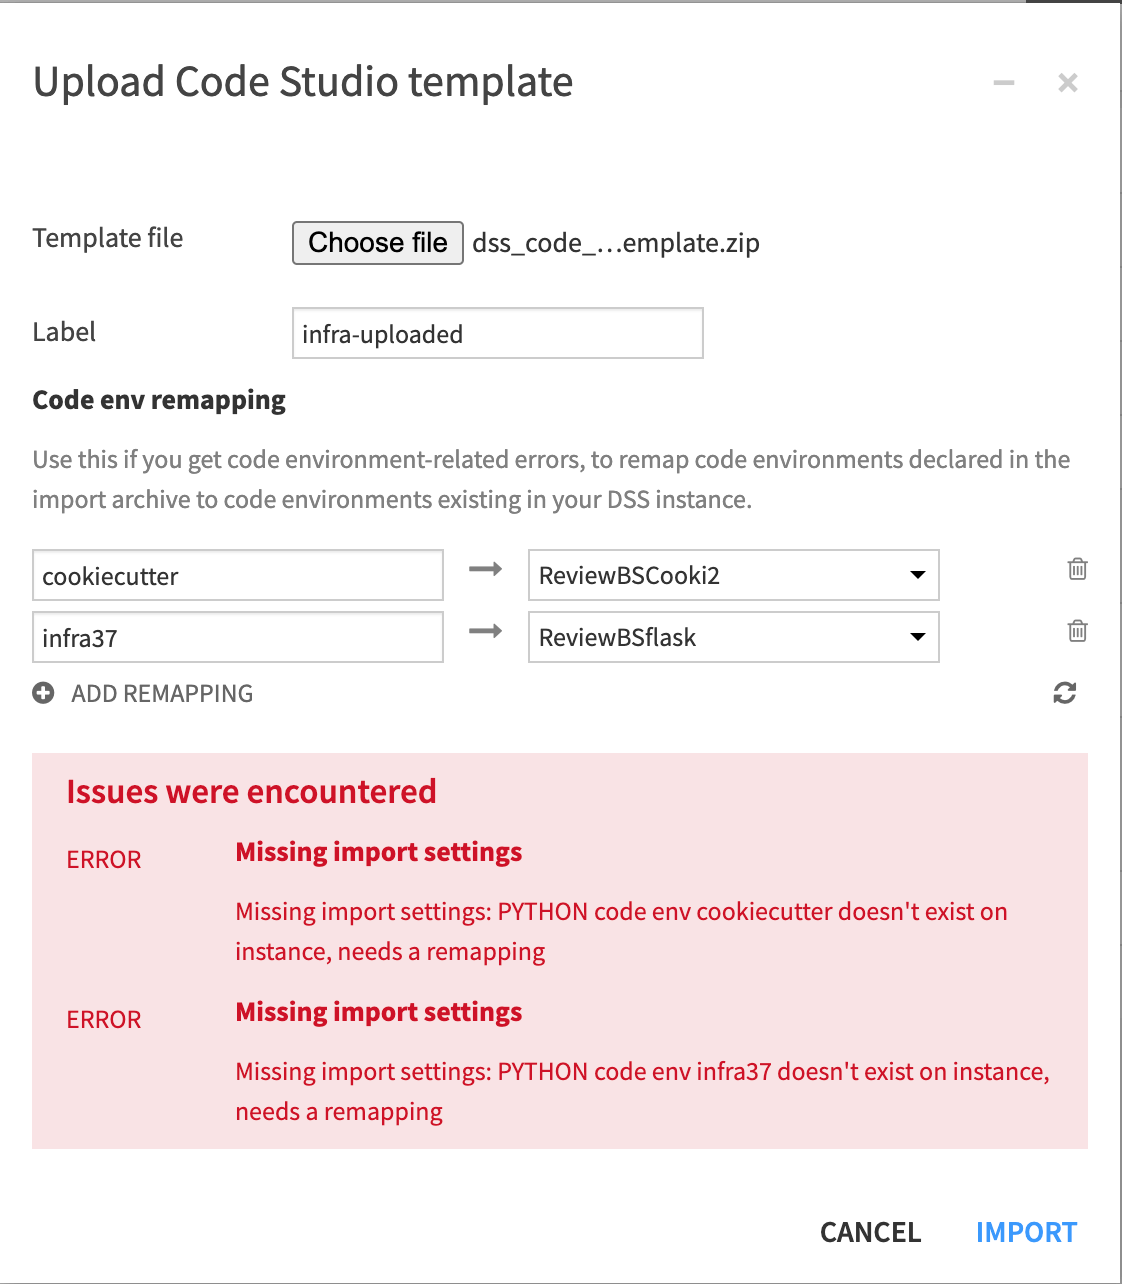
Import the template you’ve just downloaded.
If you encounter code environment related errors, you can remap
cookiecutterandinfra37to code environments existing in your Dataiku instance.
After importing the template, click on Build to prepare an image ready to be deployed for the Code Studio.
With these steps, your Code Studio template is ready for use. This enables you to swiftly initiate web application development in Dataiku projects, leveraging frameworks like Vue and Angular.
Manual setup#
This section explains how to create and configure a Code Studio template manually. You’ll learn how to add and modify the essential building blocks within a template.
Template creation#
To create a template:
Go to the Application menu.
Click Administration.
Select the Code Studio panel.
Click on the + Create Code Studio Template button.
Give a name to your new template.
Click on the Create button.
Finally, go to the Definition panel.
Managing block definitions#
File synchronization: This block synchronizes the file system between Code Studio and Dataiku. In this block, you can define some directories or files you want to exclude from synchronization. In the Excluded files section, enter the patterns:
node_modules/,.angular/,pycache.Kubernetes Parameters: Configure Kubernetes settings, if applicable.
Visual Studio Code: Add a Visual Studio Code block. Typically, no settings need to be changed here.
Append to Dockerfile: Insert this block and include the following Dockerfile content:
USER root
RUN yum -y module install nodejs:18

RUN node -v

RUN yum install -y npm && \
mkdir -p /usr/local/lib/node_modules && \
chown dataiku:dataiku -R /usr/local/lib/node_modules && \
npm install npm -g && \
npm install pnpm -g && \
npm install yarn -g && \
npm install @angular/cli -g

RUN yum -y remove git && \
yum -y remove git-\* && \
yum -y install https://packages.endpointdev.com/rhel/8/main/x86_64/endpoint-repo.noarch.rpm && \
yum -y install git

RUN cd /opt/dataiku/code-server/lib/vscode/extensions && \
npm init -y && \
npm i typescript
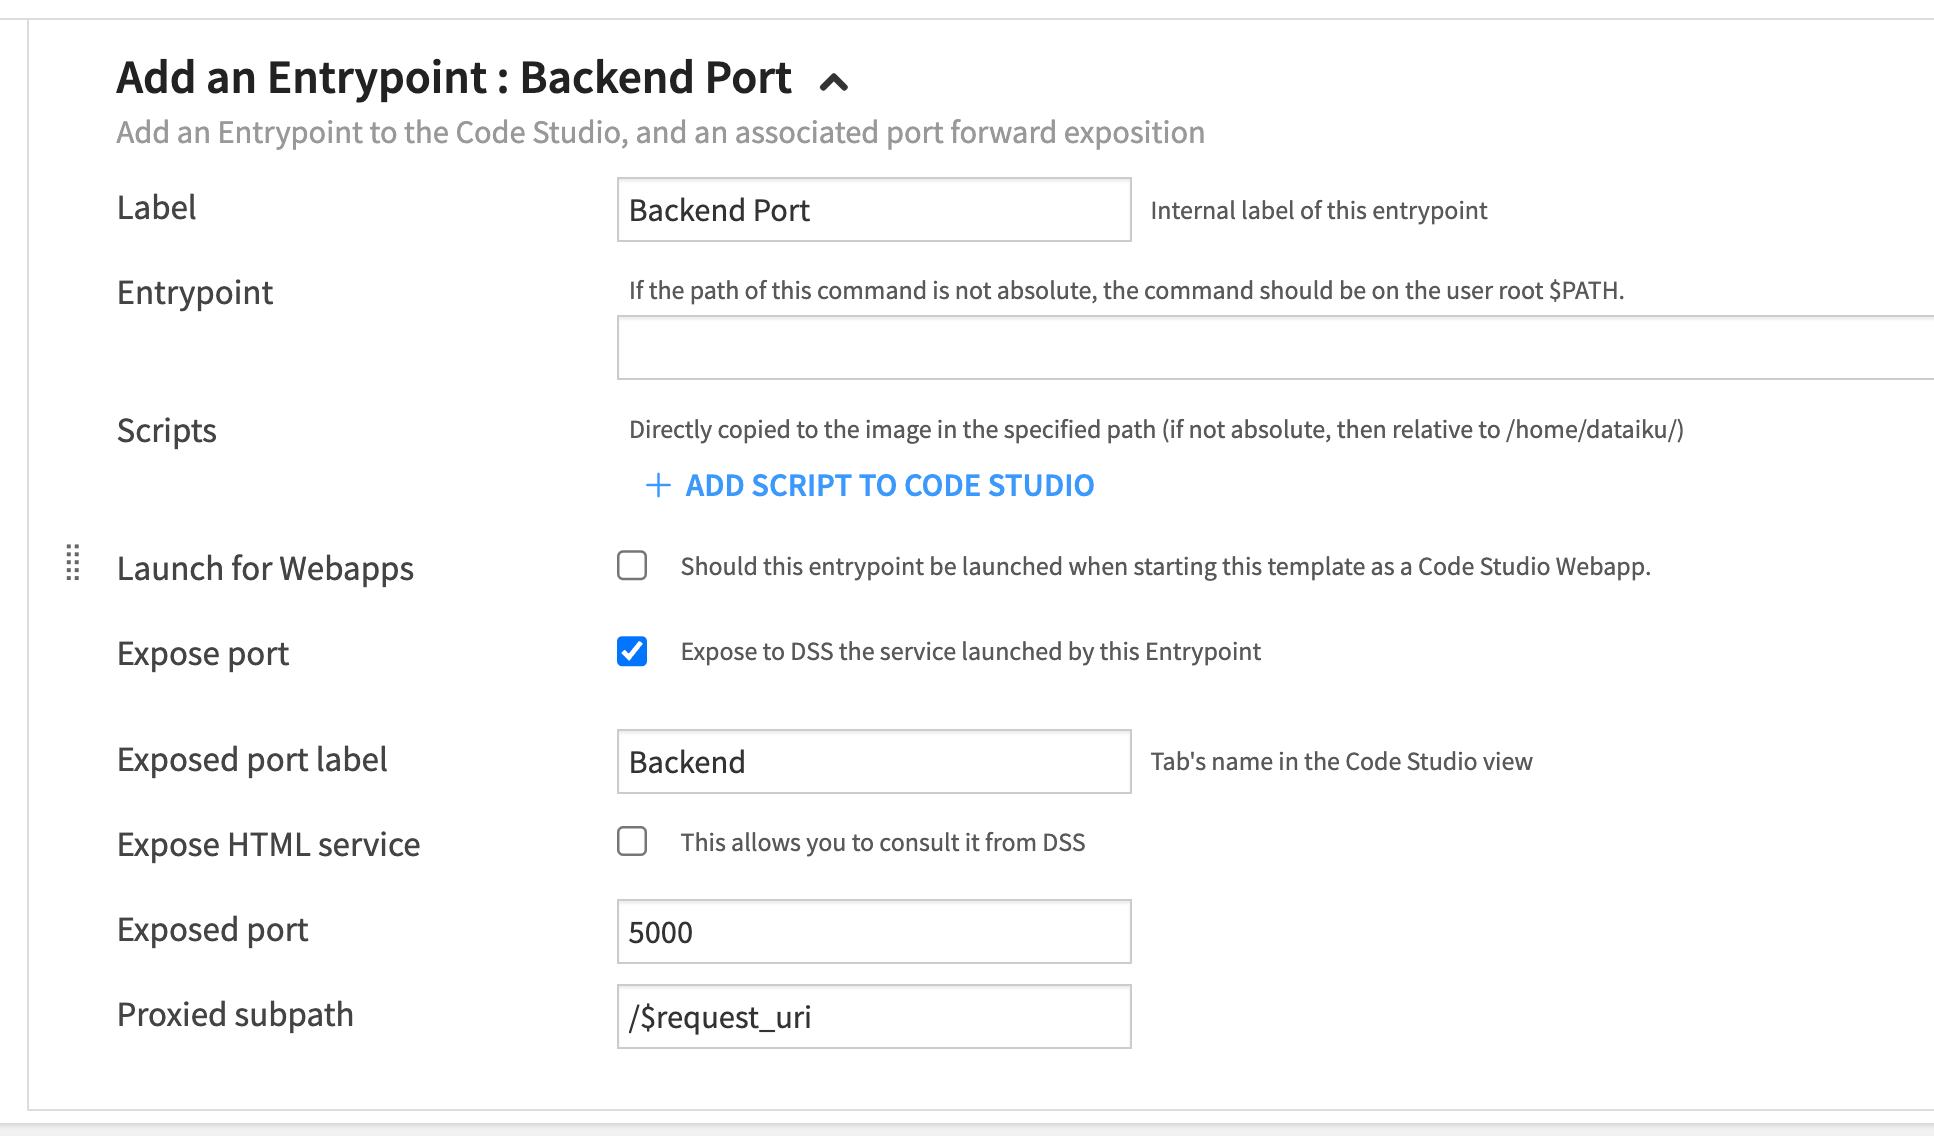
Add an Entrypoint: Expose the HTML service to make the frontend accessible from the Code Studio UI when launching your web application client server. Use
/$request_urifor the proxied subpath.
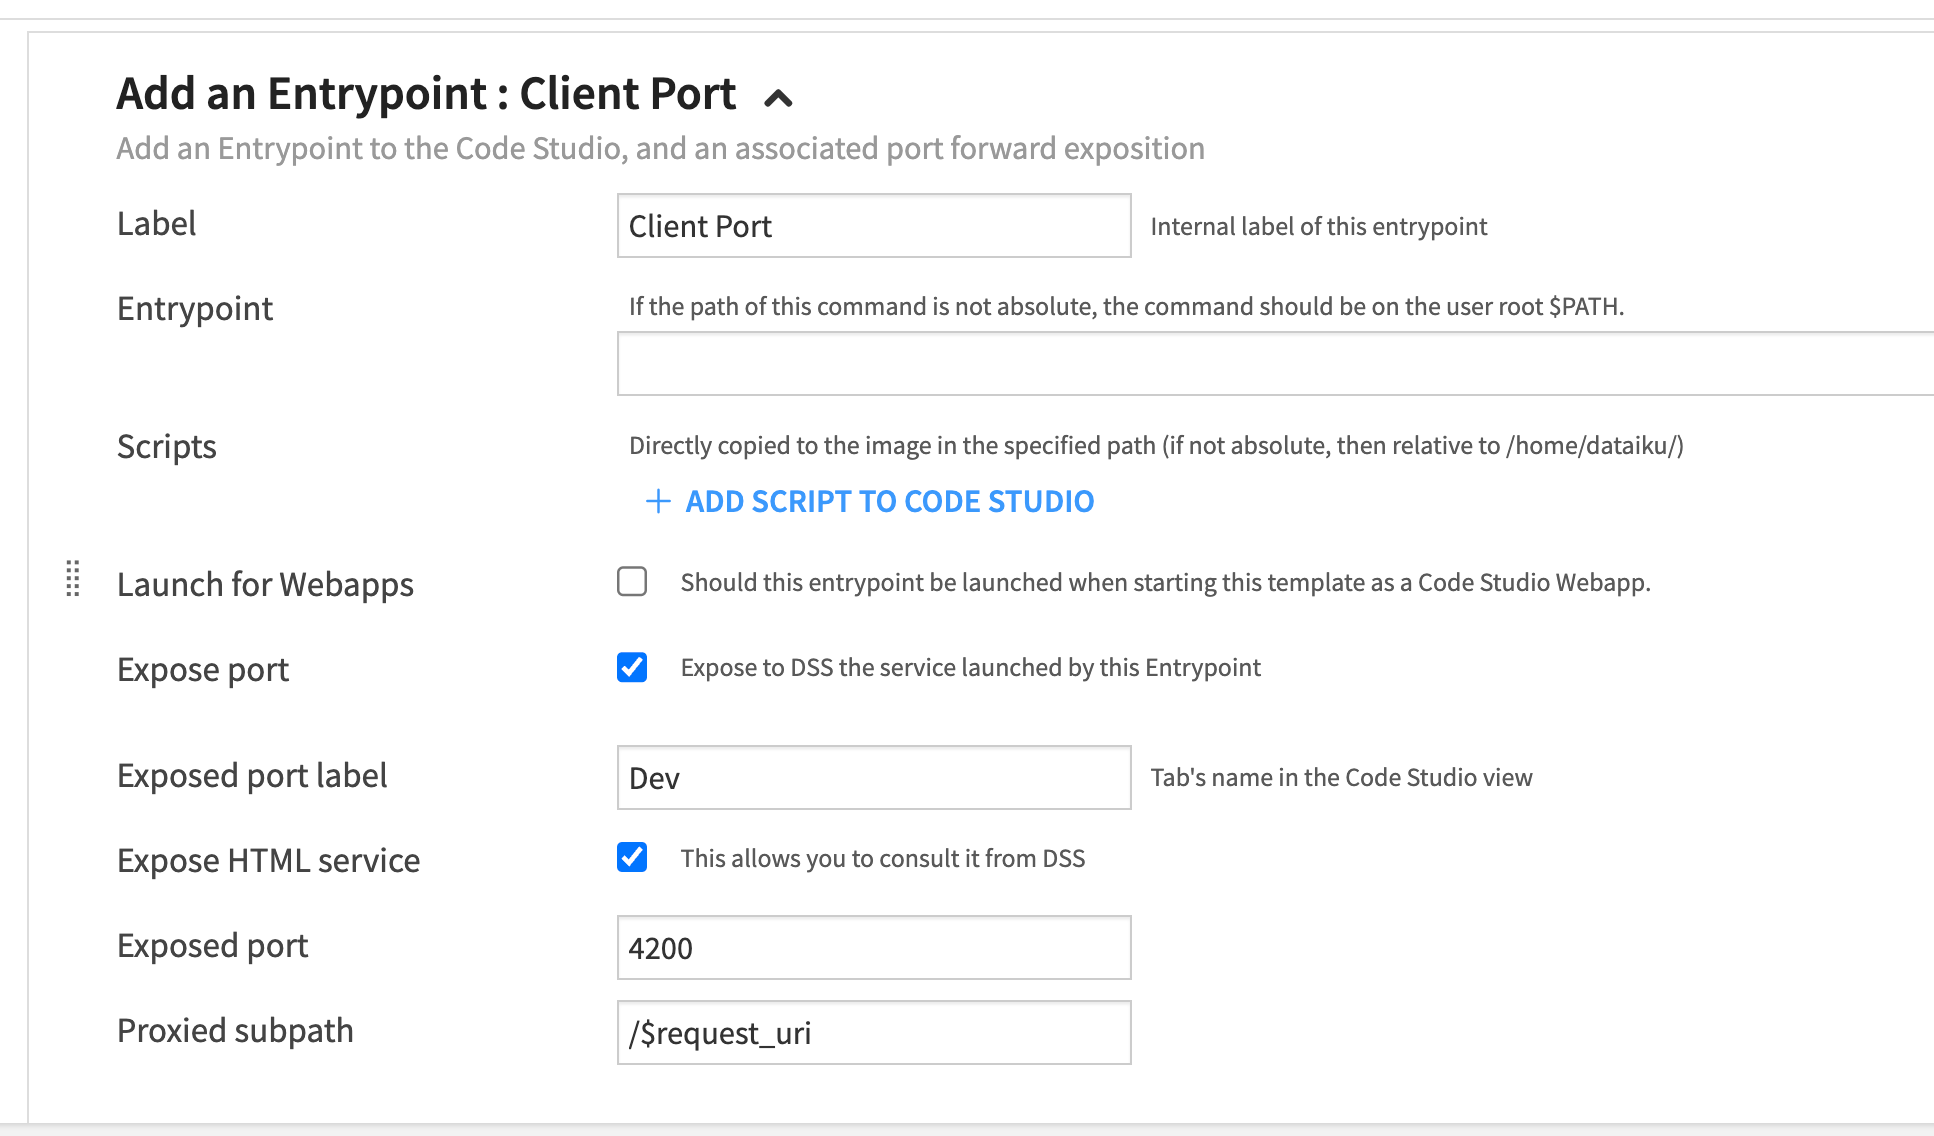
Add an Entrypoint Add another entry point for your Flask backend. Use
/$request_urifor the proxied subpath here as well.
Add Code environments: Finally, include the previously configured code environments for Cookiecutter.
Add Code environments: Finally, include the previously configured code environments for Flask.
Build the template to prepare an image that is ready to be deployed for the Code Studio.
Using the Configured Template#
Once the template is set up, using it is straightforward:
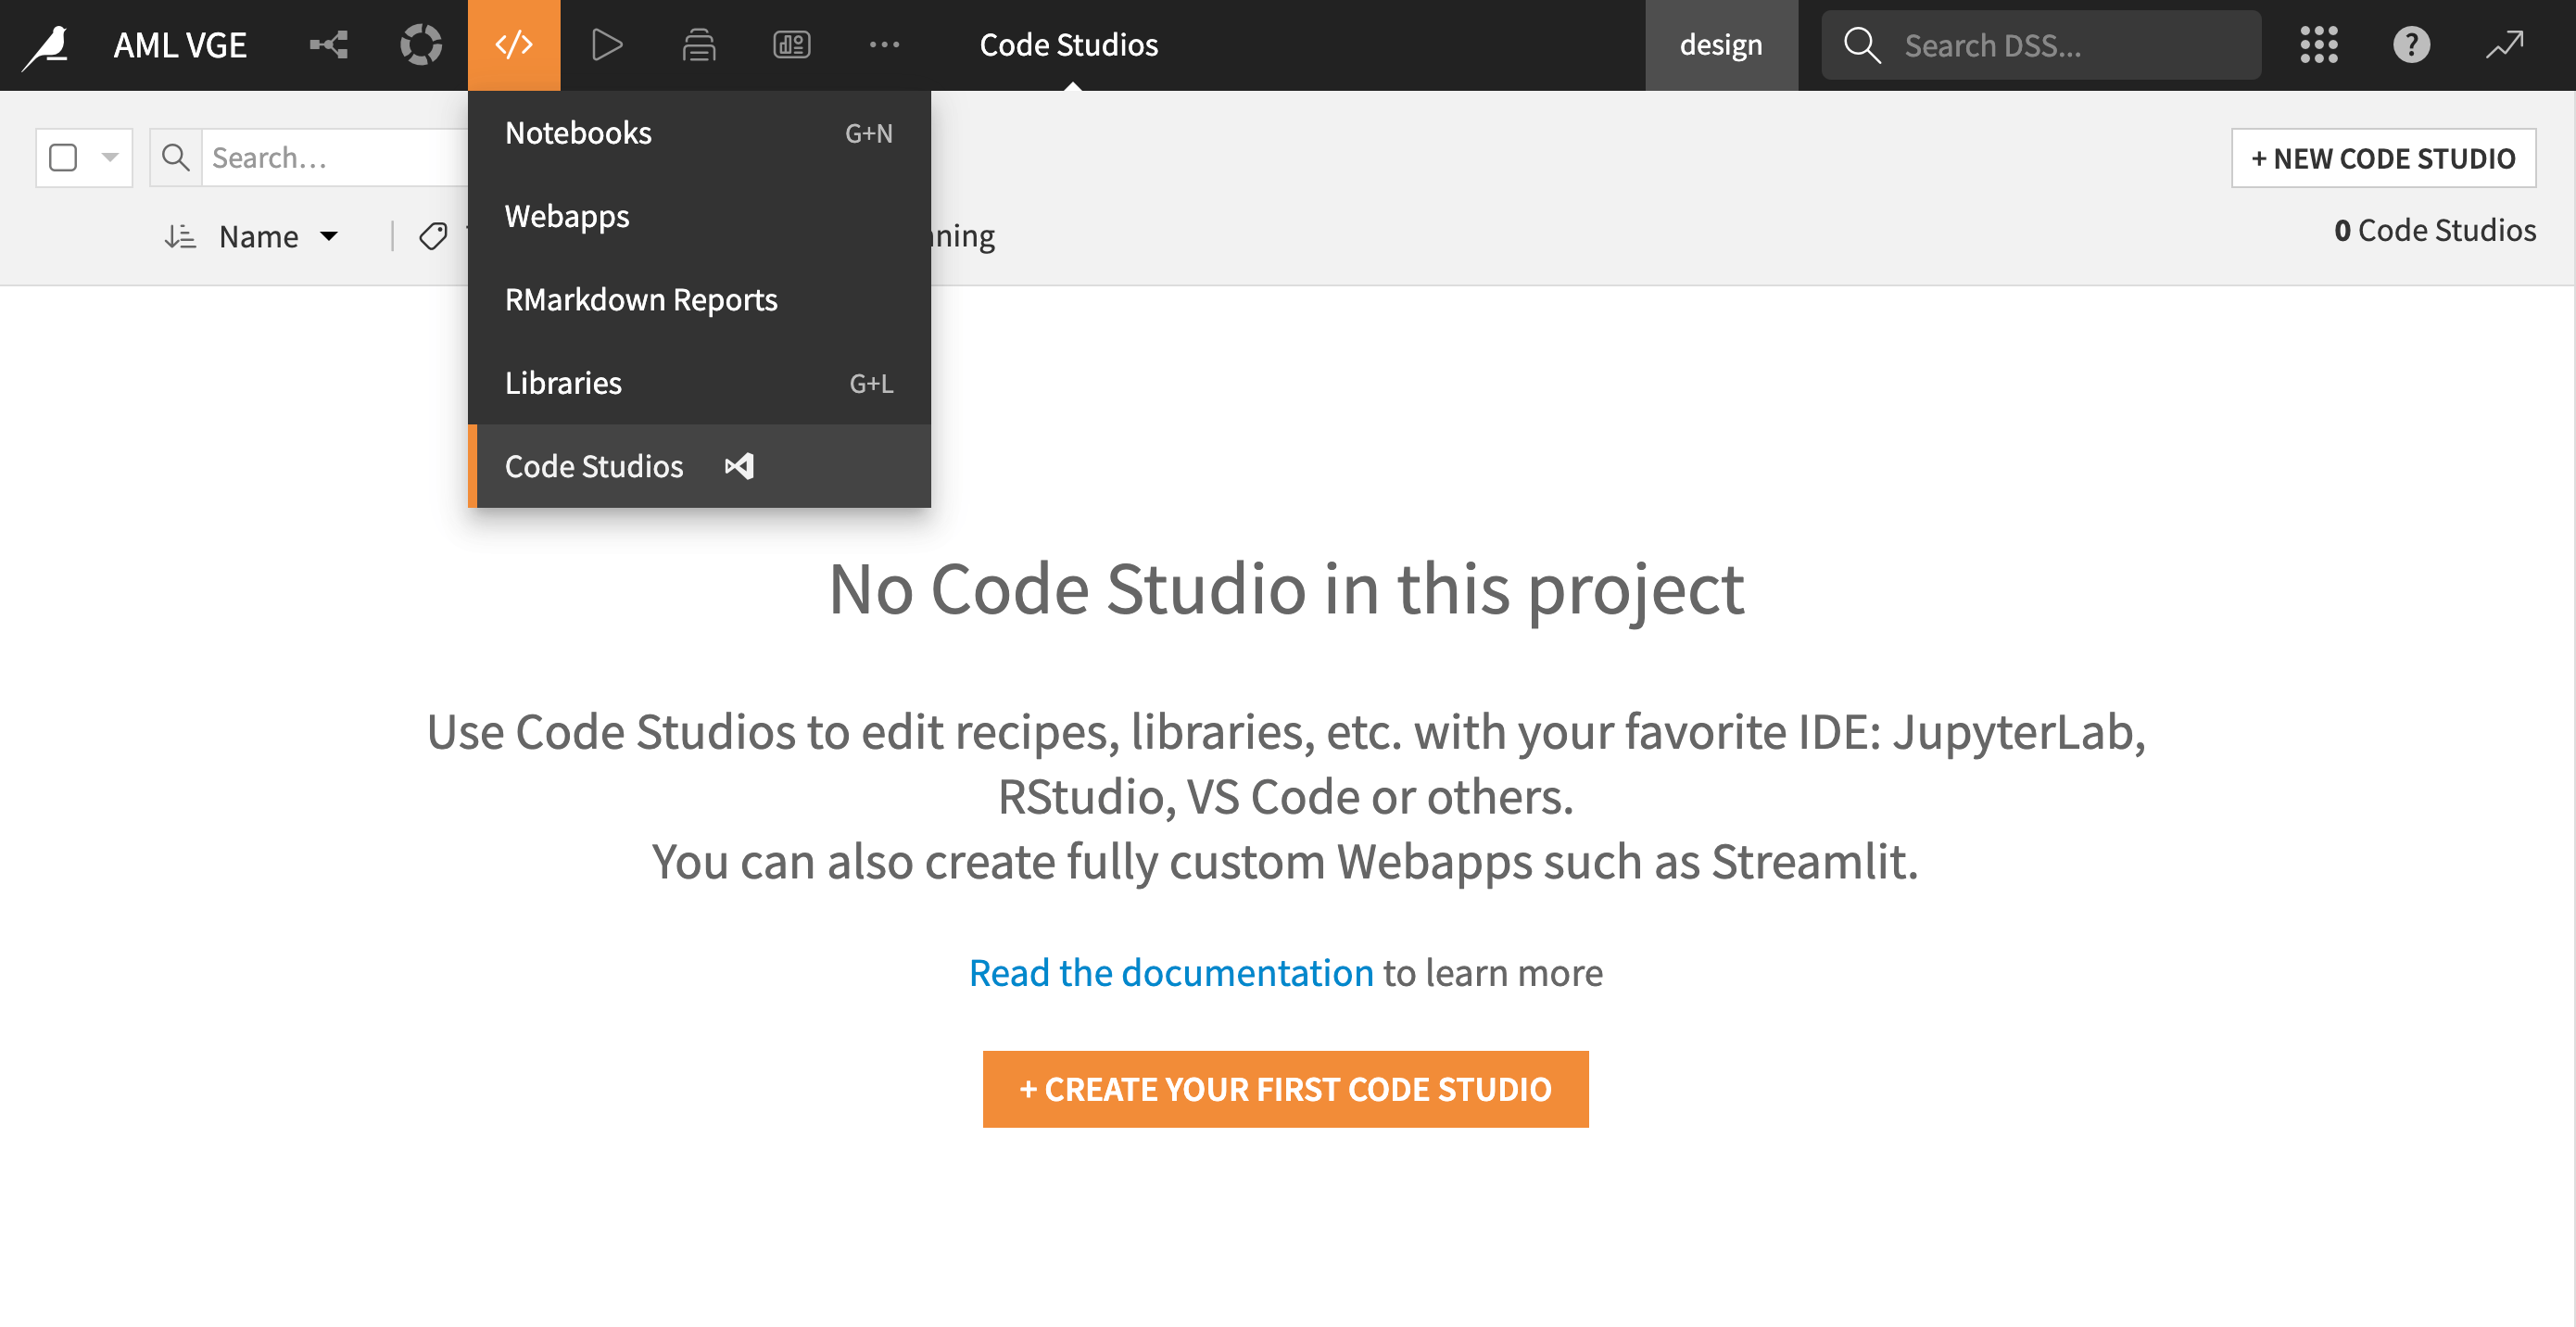
Navigate to </> -> Code Studios in the top navigation bar.
Click on + New Code Studio in the upper right and choose your configured template.
Start the code studio.