

Writing a macro for managing regression tests#
Context#
When a project is modified, the changes may impact the final result. While some impacts are desired, others may result in defects. In software development, testing aims to verify these modifications automatically. There are many types of testing, but they can be classified into three categories: functional testing, performance testing, and maintenance testing. Maintenance testing verifies that the changes introduced have no impact on the rest of the project.
Software testing could be applied to a Dataiku Project. In this tutorial, the focus is on maintenance testing. When a Project is modified, we want to ensure the final result does not change. This is called regression testing, and you could apply it in various ways. Whenever a Flow change is made to a Project, there is a risk of defects. In this case, we may want to test these changes.
We can test the Flow modifications, by replacing the input Datasets, with “well-known” Datasets, running the Flow, verifying that the defined Metrics/Checks are still good, and reusing previously used Datasets. This task is repetitive, could be very long and fastidious, and error-prone. In that case, a Macro (for more information about Macros, see DSS Macros) could be written to automate this workflow with the following steps:
Replace the inputs of the Flow with “well-known Datasets” (aka trusted Datasets)
Build the Flow
Read the outputs and compares them with the trusted outputs, and issue a report with the results
Restore the original inputs of the Flow
Writing a Macro will also provide a way to be automatically run when the Flow is modified, by using a scenario (for more information, please see Automation scenarios). This tutorial is spread into four parts, readers that know how a macro is created and configured can easily skip the first two parts:
Macro creation: How to create a new Macro component.
Macro configuration: How to configure the Macro component.
Analysis and inputs: Analysis of the context of the Macro to define the Macro parameters.
Coding the macro: How to code the Macro.
Tip
Starting from version 13.3.0, Dataiku has a powerful native feature for non-regression testing. The reference documentation and the knowledge base provide comprehensive information about this feature.
Macro creation#
Creation by the user interface#
We can create a Macro from the plugin component interface (for more information on Plugin development, please see Developing plugins) and choose “new component” (Fig. 1).
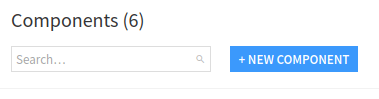
Figure 1: New component.#
and then choose Macro (Fig. 2)

Figure 2: Plugin – New Macro component.#
and fill the form to create a Macro, by choosing a name for the Macro (here regression-test), as shown on
Fig. 3.
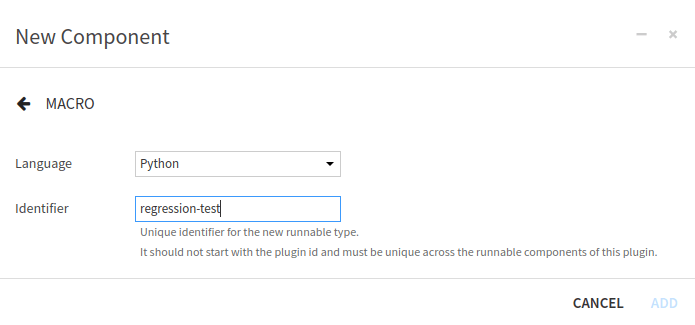
Figure 3: Plugin – Form for new Macro component.#
Creation by code#
Alternatively, we can create a Macro component directly inside the Plugin code directory, by making the following
directory (Fig. 4). We can choose a different name for the directory
regression-test, but the other names can not be changed. So we have to keep python-runnables (the directory
where goes the Macros), and also have to keep runnable.json and runnable.py (to be able to run the Macro).
As explained in Component: Macros, this is because a macro is essentially a function wrapped
in a class.
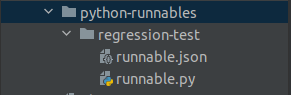
Figure 4: Plugin – Directory of a Macro component named regression-test.#
Macro configuration#
Description#
The configuration of the Macro is done in the runnable.json file. Each component plugin begins with a meta
section that contains the name of the component (label), the description of the component (description) and
an icon to represent the component (icon). For this Macro, we could have written:
"meta": {
    "label": "Regression tests",
    "description": "This macro aims to do some regression tests, by substituting original datasets with some trusted datasets. Then builds the flow, reads the output, produces a report, and brings back the flow to its original state.",
    "icon": "icon-check"
},
This description is on the plugin page as shown in Fig. 5, and Fig. 7.
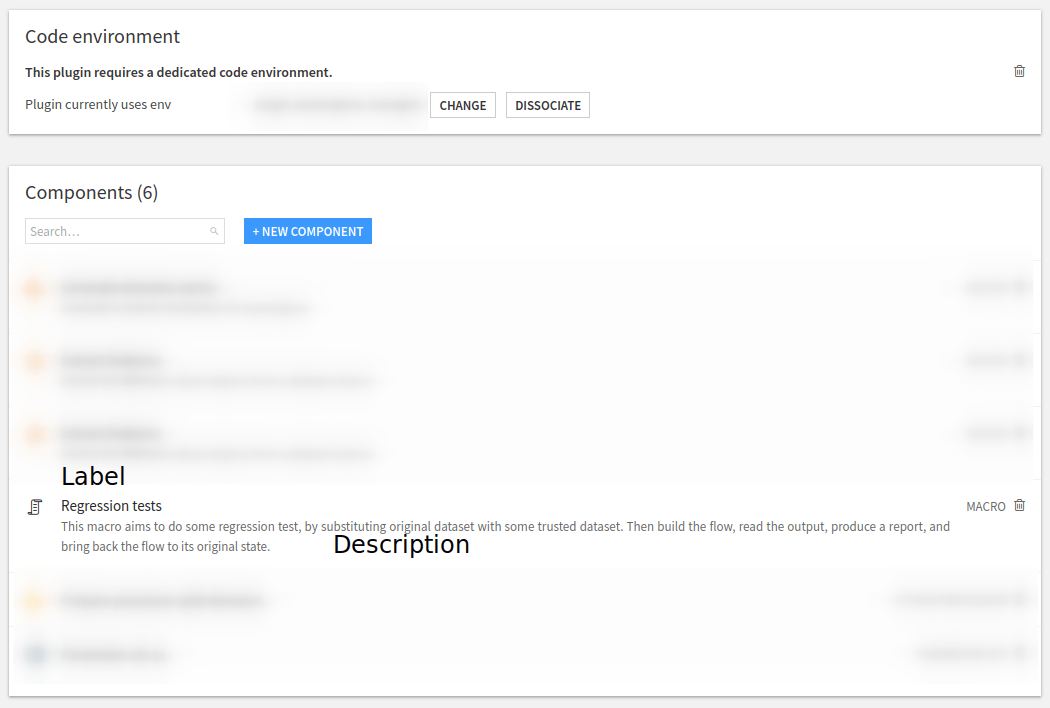
Figure 5: Plugin – Macro description.#
Global Configuration#
Then we will need to configure the Macro. Does this Macro run with UNIX user identity, or with the identity of the
final user (this is relevant if only UIF is enabled). Unless having a clear understanding of all UIF implications,
we should set it to true ("impersonate": true). We will also need to set the permission that a user needs to
see/run the Macro. Here, as we change the Flow, the user needs "WRITE_CONF". Then, we must specify what the Macro
returns among:
NONE: no resultHTML: a string that is an HTML (utf8 encoded)FOLDEF_FILE: a (folderId,path) pair to a file in a folder of this project (json-encoded)FILE: raw data (as a python string) that will be stored in a temp file by DataikuURL: an URL
We have chosen to return an HTML string. And finally, we should also define where this Macro will appear in the
Dataiku. We can target Dataiku objects (DATASET, DATASETS, API_SERVICE, API_SERVICE_VERSION,
BUNDLE, VISUAL_ANALYSIS, SAVED_MODEL, MANAGED_FOLDER) or the project itself. If we target Dataiku
objects, then the Macro can prefill some of its parameters, and will contextually appear in the
GUI when it is relevant, for example in the “Other actions” section in the right panel
(see Fig. 6).

Figure 6: Plugin – Contextual action.#
If we target the Project itself, the Macro will appear in the “Macros” submenu in the project settings, as shown in Fig. 7. In both cases, we can see that the icon we previously define (in the description section) is used.
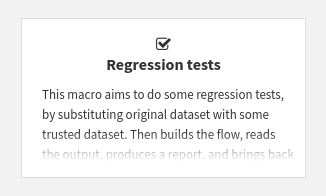
Figure 7: Plugin – Macro integration inside the Macros submenu.#
This leads to the code shown in Code 2.
"impersonate": true,
"permissions": ["WRITE_CONF"],
"resultType": "HTML",
"resultLabel": "Regression tests results",
"macroRoles": [
    {
        "type": "DATASETS",
        "targetParamsKey": "original-dataset",
        "applicableToForeign": true
    },
    {
        "type": "PROJECT_MACROS"
    }
]
Analysis and inputs#
Note
Several assumptions help simplify the code for the macro. For example, it doesn’t use every input for the Project, only the specified Datasets. This tutorial provides a starting point that could be adapted to specific needs.
Input datasets#
While we can get all the inputs to a Flow, knowing which inputs we should replace with which trusted outputs can be challenging. In addition, some of the input Datasets may not be relevant to change because they do not impact the result or are not part of the Flow we want to test. So we need to ask the user which input Datasets are concerned by this test.
“Well-known Datasets”#
Since trusted Datasets are not part of the initial Flow we want to test, we need to know which Datasets are “well-known”. We also need to know which trusted Dataset will replace which input Dataset, as it may be difficult to replace one Dataset with another one.
Metrics#
The purpose of the macro is to ensure changes to the Flow do NOT impact outcomes by checking relevant Metrics of the output Datasets against an expected result. We can assume that the relevant Metrics are those of the Datasets at the end of the Flow. But other Datasets may also contain relevant Metrics. So we want the user to specify the Datasets that contain the Metrics that this macro will observe.
Summary#
To summarize, this Macro requires as input:
the Datasets to be substituted
the trusted Datasets
a mapping from input Datasets to trusted Datasets
a list of Datasets that the macro will use for testing Checks and Metrics
Macro parameters definition#
In the previous section, we decided that to realize this Macro, we need 4 parameters (for more information about types
and usages of Macro parameter, see Parameters) (Datasets to substitute, trusted datasets, a
mapping, Datasets that have the metrics to test). So we need to define these parameters in the runnable.json file
too (see Code 3). For each parameter, we have:
name: used when we want to access the value of this parameter when coding the plugin.label: used when Dataiku displays the graphical user interface to enter the values for the parameter.type: indicates which values are accepted for this parameter.mandatory: indicates if the parameter needs to be entered or not.
We can also have some other optional fields. Here we have used description (to display inline help),
canSelectForeign (to allow the foreign object to be entered). Using those parameters’ definitions, Dataiku will
display the input screen as shown in Fig. 8.
"params": [
    {
      "name": "original-dataset",
      "label": "Dataset to substitute",
      "type": "DATASETS",
      "mandatory": true
    },
    {
      "name": "trusted-dataset",
      "label": "Trusted Dataset",
      "type": "DATASETS",
      "description": "Select the datasets",
      "mandatory": true,
      "canSelectForeign": true
    },
    {
      "name": "mapping",
      "label": "Indicate which dataset will be used as a substitute (original -> substitute)",
      "type": "MAP",
      "mandatory": true
    },
    {
      "name": "dataset-to-build",
      "label": "Dataset to check for metrics",
      "type": "DATASETS",
      "description": "Select the datasets where you want the metrics to be tested",
      "mandatory": true,
      "canSelectForeign": true
    }
],
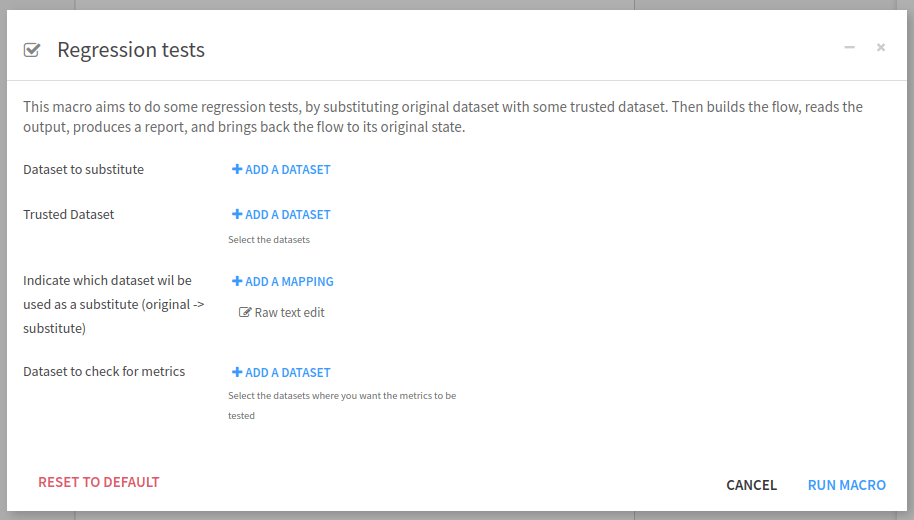
Figure 8: Plugin – Visual parameters input interface.#
Code 4 show the whole code for runnable.json.
{
    "meta": {
        "label": "Regression tests",
        "description": "This macro aims to do some regression tests, by substituting the original dataset with some trusted dataset. Then builds the flow, reads the output, produces a report, and brings back the flow to its original state.",
        "icon": "icon-check"
    },
    "params": [
        {
            "name": "original-dataset",
            "label": "Dataset to substitute",
            "type": "DATASETS",
            "mandatory": true
        },
        {
            "name": "trusted-dataset",
            "label": "Trusted Dataset",
            "type": "DATASETS",
            "description": "Select the datasets",
            "mandatory": true,
            "canSelectForeign": true
        },
        {
            "name": "mapping",
            "label": "Indicate which dataset will be used as a substitute (original -> substitute)",
            "type": "MAP",
            "mandatory": true
        },
        {
            "name": "dataset-to-build",
            "label": "Dataset to check for metrics",
            "type": "DATASETS",
            "description": "Select the datasets where you want the metrics to be tested",
            "mandatory": true,
            "canSelectForeign": true
        }
    ],
    "impersonate": true,
    "permissions": ["WRITE_CONF"],
    "resultType": "HTML",
    "resultLabel": "Regression tests results",
    "macroRoles": [
        {
            "type": "DATASETS",
            "targetParamsKey": "original-dataset",
            "applicableToForeign": true
        },
        {
            "type": "PROJECT_MACROS"
        }
    ]
}
Coding the macro#
Now we have entirely configured the Macro, we can code it. If we have created the Macro from the visual interface,
the runnable.py comes with the default skeleton just shown in
Code 5. The __init__ (line 7) function is the place
to retrieve the values of the parameters. The highlighted function, line 24 (def run(self, progress_callback):),
is where the processing starts.
 1# This file is the actual code for the Python runnable to-be-deleted
 2from dataiku.runnables import Runnable
 3
 4class MyRunnable(Runnable):
 5    """The base interface for a Python runnable"""
 6
 7    def __init__(self, project_key, config, plugin_config):
 8        """
 9        :param project_key: the project in which the runnable executes
10        :param config: the dict of the configuration of the object
11        :param plugin_config: contains the plugin settings
12        """
13        self.project_key = project_key
14        self.config = config
15        self.plugin_config = plugin_config
16
17    def get_progress_target(self):
18        """
19        If the runnable will return some progress info, have this function return a tuple of
20        (target, unit) where unit is one of: SIZE, FILES, RECORDS, NONE
21        """
22        return None
23
24    def run(self, progress_callback):
25        """
26        Do stuff here. Can return a string or raise an exception.
27        The progress_callback is a function expecting 1 value: current progress
28        """
29        raise Exception("unimplemented")
Initialization#
The initialization is straightforward. We just have to retrieve the parameters. For implementation purposes, that will be discussed later. We also need to sort the Datasets where the Metrics are and build the inverted map from tested Datasets to trusted Datasets.
 1def __init__(self, project_key, config, plugin_config):
 2    """
 3    :param project_key: the project in which the runnable executes
 4    :param config: the dict of the configuration of the object
 5    :param plugin_config: contains the plugin settings
 6    """
 7    self.project_key = project_key
 8    self.config = config
 9    self.plugin_config = plugin_config
10    self.original_dataset = config.get("original-dataset", [])
11    self.trusted_dataset = config.get("trusted-dataset", [])
12    self.mapping = config.get("mapping", {})
13    self.dataset_to_build = config.get("dataset-to-build", [])
14    self.dataset_to_build.sort()
15    self.inv_mapping = {v: k for k, v in self.mapping.items()}
The highlighted lines retrieve the values of the parameters filled in the window when running the macro. We have
3 lists of dataset name ("original-dataset", "trusted-dataset", "dataset-to-build"), and one dict
("mapping") for the mapping as explained in this section.
The different names come from the runnable.json ("name" field of each parameter).
The run function#
Before running the Dataset substitution, we need to check if all provided Datasets exist. So we define the function is_all_datasets_exist for this purpose. We test all the provided Datasets, as if one is missing, it may leave the project in an unstable state.
def is_all_datasets_exist(project, datasets):
    """
    Test if all datasets exist
    :param project: current project
    :param datasets: list of dataset names
    :return: true if all datasets exist
    """
    exist = True
    for d in datasets:
        exist &= project.get_dataset(d).exists()
    return exist

.../...

client: Union[DSSClient, TicketProxyingDSSClient] = dataiku.api_client()
project: DSSProject = client.get_project(self.project_key)
# Checking if the all datasets are defined
if not is_all_datasets_exist(project, self.original_dataset):
    raise Exception("All original datasets do not exist")
if not is_all_datasets_exist(project, self.trusted_dataset):
    raise Exception("All trusted datasets do not exists")
if not is_all_datasets_exist(project, self.dataset_to_build):
    raise Exception("Can not find all datasets for metric checks.")
We could also have checked if the mapping is correct, by looking if the keys are defined in the original-dataset,
and if all values of the mapping are in the trusted_dataset. This is left to the reader.
Once we are sure that we will have no trouble when running the Macro, we have to retrieve and store the existing
Metrics and Checks to be able to compare them with the trusted Dataset Metrics.
def is_used_metrics(metric):
    """
    Test if a metric is used
    :param metric: the metric to test
    :return: true if it is used
    """
    return metric['displayedAsMetric']


def get_checks_used(settings):
    """
    Get the list of all used checks for a dataset
    :param settings: the settings of the dataset
    :return: the list of all checks used for this dataset
    """
    return list(map((lambda check: 'check:CHECK:'+check), settings['metricsChecks']['displayedState']['checks']))


def extract_metrics_and_checks_used(dataset: DSSDataset) -> list:
    """
    Get all metrics and checks used for the dataset
    :param dataset: the dataset to extract information
    :return: a list containing all metrics and checks used for the dataset
    """
    last_metrics = dataset.get_last_metric_values().get_raw()
    return_list = list()
    id_metrics = list(map((lambda metric: metric['metric']['id']), filter(is_used_metrics, last_metrics['metrics'])))
    return_list.extend(id_metrics)
    id_checks = get_checks_used(dataset.get_settings().get_raw())
    return_list.extend(id_checks)
    return_list.sort()

    return return_list

.../...
# Previous metrics
for d in self.dataset_to_build:
    dataset = project.get_dataset(d)
    last_metrics = dataset.get_last_metric_values()
    metrics_and_check_used = extract_metrics_and_checks_used(dataset)
    for metric in metrics_and_check_used:
        metric_value = last_metrics.get_metric_by_id(metric)
        if metric_value and metric_value['lastValues']:
            result[metric] = {
                'initialValue': metric_value['lastValues'][0]['value']
            }
Then we replace the existing dataset with the trusted ones:
flow: DSSProjectFlow = project.get_flow()
for d in self.original_dataset:
    flow.replace_input_computable(d, self.mapping[d])
We build the Flow, and run Checks/Metrics:
definition = {
    "type": "RECURSIVE_FORCED_BUILD",
    "outputs": [{
        "id": "%s" % output_name,
    } for output_name in self.dataset_to_build]
}
job = project.start_job(definition)
state = ''
while state != 'DONE' and state != 'FAILED' and state != 'ABORTED':
    time.sleep(1)
    state = job.get_status()['baseStatus']['state']
After this step, we have to retrieve the resulting Metrics and Checks using the same process as here, compare them and put back the Flow by doing the inverse substitution that we have done here. Don’t forget to compute the Metrics, and run the Checks before retrieving them!
Conclusion#
What is left to the reader? As we choose to produce an HTML report, the reader should produce this report. The reader can change the Macro result type, for this purpose this documentation (Component: Macros) will be of interest.
In this tutorial, we learn to implement a regression test by using a Macro to test a Flow change. This kind of test helps the data scientists to test their modifications before putting them into production. This Macro aims to change datasets by trusted datasets, but you could also use it to test the impact of changing the connection type of Datasets. Defining a Macro is an elegant solution for many repetitive tasks. Macros can be run as a step in a scenario, leading to more automatization.