

My first Code Studio#
When coding and building solutions in Dataiku, it can be helpful to access your own integrated development environment (IDE), such as JupyterLab or Visual Studio Code (VS Code). Dataiku Code Studios allow you to do just that, and much more! In this tutorial, you will learn how to create a Code Studio template and run it.
Prerequisites#
A Dataiku 11+ instance.
Administrator privileges for your user profile.
A Kubernetes cluster is configured. For details, visit Elastic AI Computation.
A base image is built. Typically, this is built using a command such as
./bin/dssadmin build-base-image --type container-exec. For details, visit Build the Base Image.
Administrator privileges for your user profile.
Creating a Code Studio template#
To use Code Studios, you’ll need to set up a Code Studio template.
Attention
You’ll need Administrator privileges on your instance to create a Code Studio template.
To do this:
In your Dataiku instance, choose Administration from the Applications menu.
Navigate to the Code Studios tab.
Select + Create Code Studio Template.

Code Studios tab in the Admin menu.#
Type a name for your template, such as
my-vsc-template, and then select Create.
Configuring general settings#
In the General tab, name and describe your template. You can add an icon. The Build section uses your default container, which you can change.
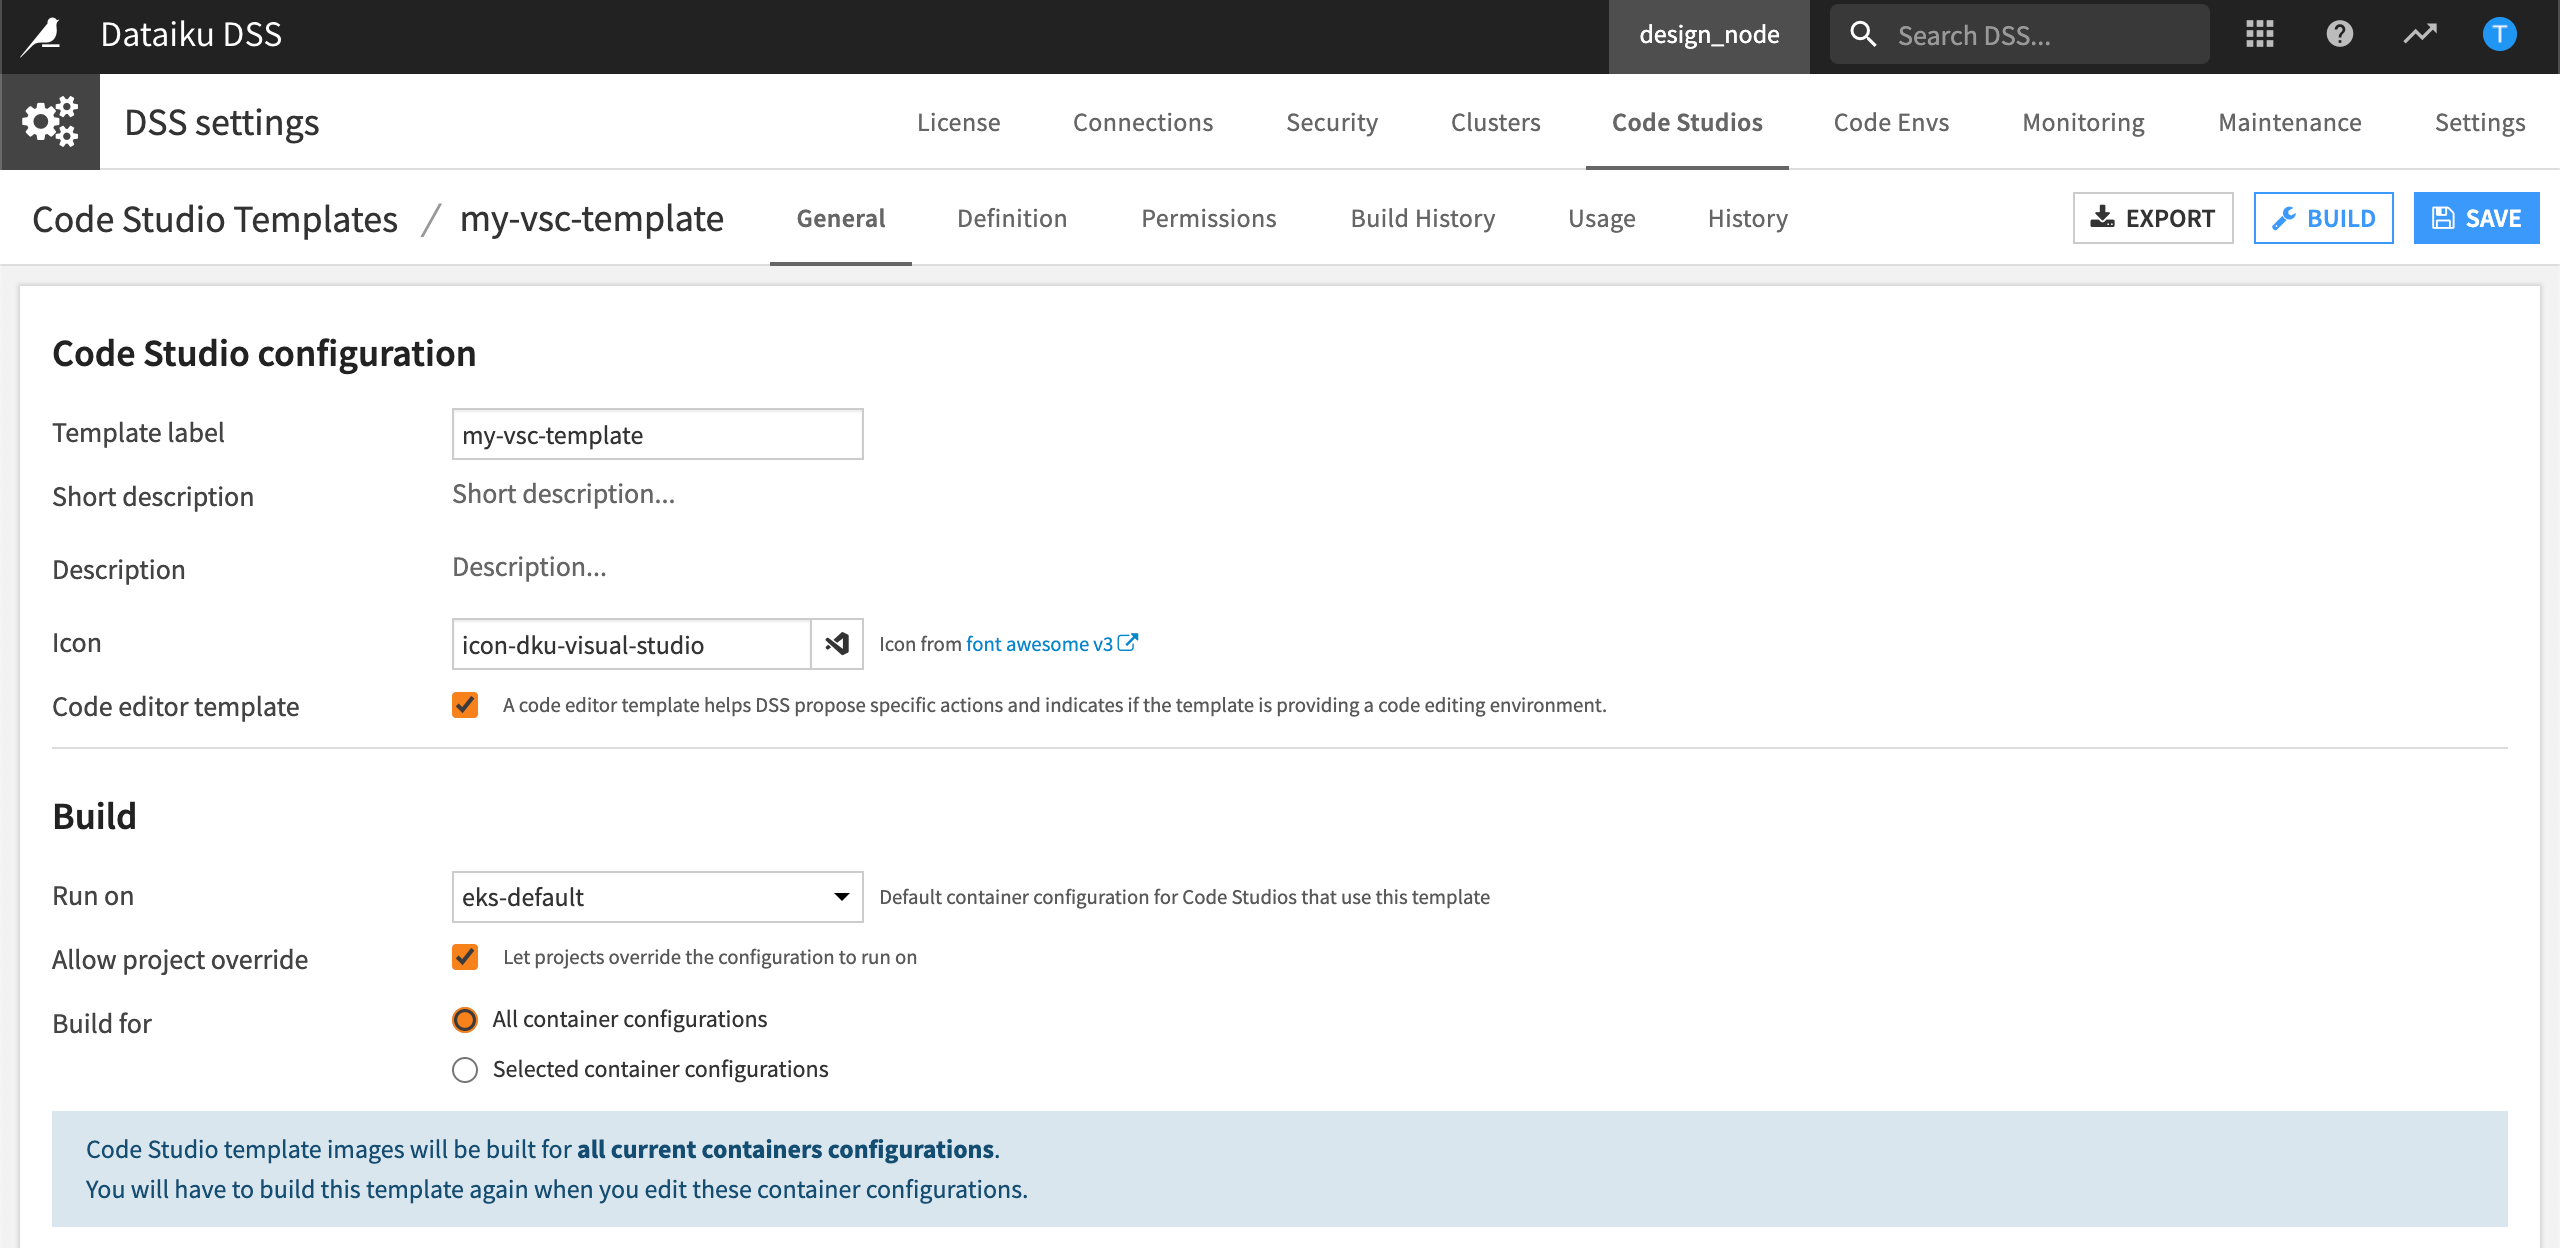
Code Studio configuration.#
Configuring definition settings#
The Definition settings define the services that your template provides. To enrich the template definition, you add blocks. By default, a Code Studio template comes with two default blocks (File Synchronization and Kubernetes Parameters):
File Synchronization: This block enables synchronisation between your Code Studio and Dataiku. There is no automatic save, and you will need to synchronise your files to save/edit your files within Code Studio.
A
CodeStudio_README.mdfile explains what those different directories are. In addition, you can find more information in the Code Studio reference documentation. Let’s summarise the use cases for every directory available in a Code Studio.Directories
Scope
Example
Default mounting location
Agent Tools
Project
Custom Python Tool files
agent-toolsCode Agent
Project
Code Agent files
code-agentsCode Studio versioned files
Code Studio
Streamlit source code files
code_studio-versionedCode Studio resources
Code Studio
Code Studio - specific images
code_studio-resourcesNotebooks
Project
Project Notebooks
notebooksProject libraries
Project
Project Libraries
project-lib-versionedProject resources
Project
Project-specific images
project-lib-resourcesProject recipes
Project
Project recipes
recipesUser config
User
IDE config files
user-versionedUser resources
User
Plugins IDE
user-resourcesWebapps
Project
Native webapps files
webappsImportant
The resources folders (
code_studio-resources,project-lib-resources,user-resources) are not versioned in the project.Note
These directories are available by default; however, a Code Studio administrator can configure them from a Code Studio template using the File synchronization block.
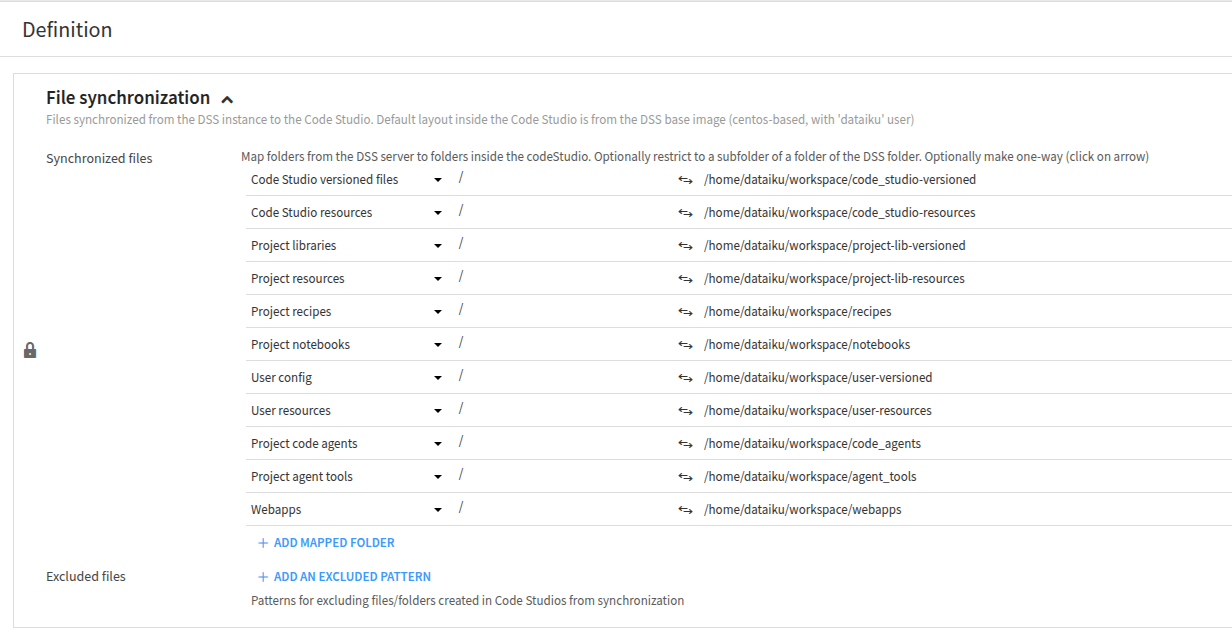
File Synchronization block.#
Kubernetes Parameters: This special block controls advanced settings. For more information, please refer to the documentation.
To edit files in Code Studio, let’s add a VS Code block so that we can use a VS Code editor in our browser.
Navigate to the Definition tab.
Select Add a Block.
In Select a block type, click Visual Studio Code.
Leave the other settings as default and select Save.
Note
The VS Code block contains a basic Python code environment and Dataiku APIs by default. To add a specific code environment, select Add Block. In Select a block type, select Add Code Environment.
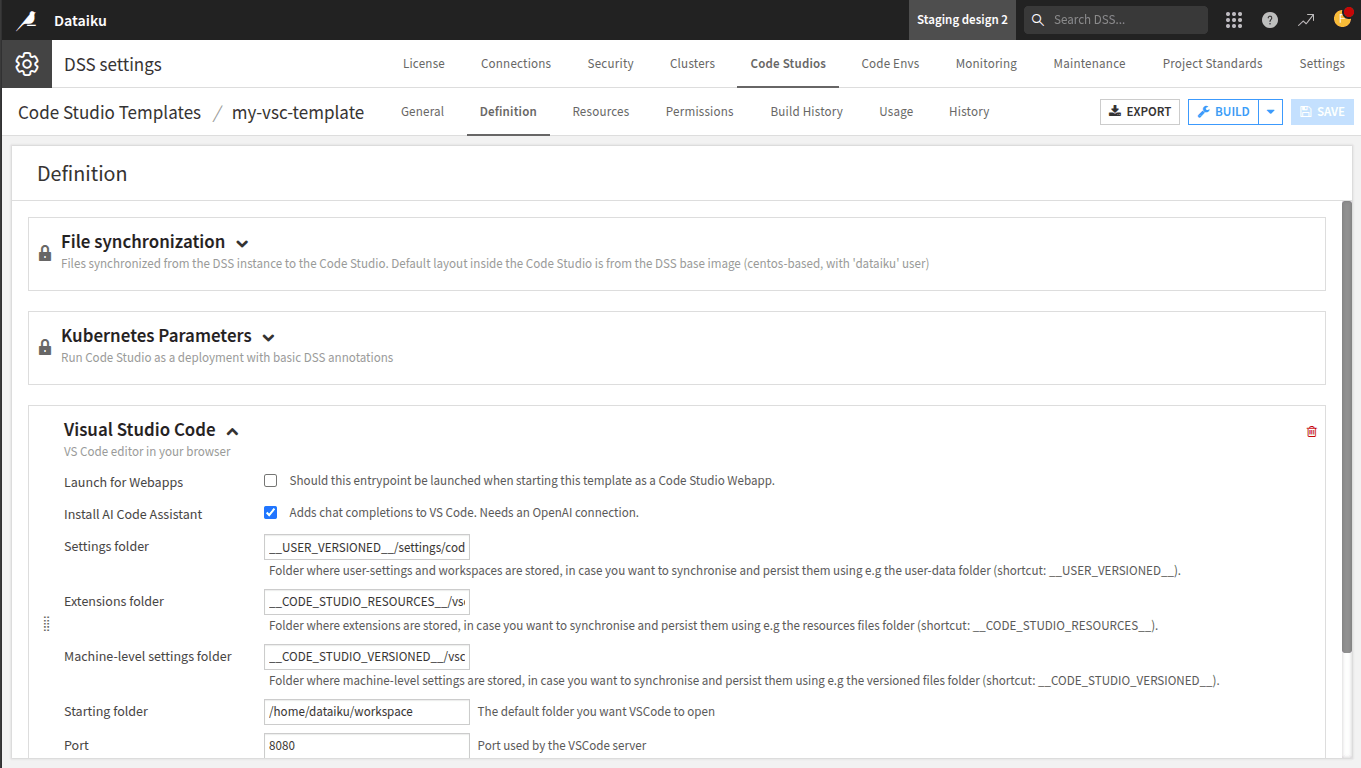
Code Studio template definition.#
Building the template#
Let’s build and publish the Docker image so that our template becomes available. To do this:
Select Build.
Wait while Dataiku begins building the Docker image.
Once the build is complete, you can select Build History to view the build details.
We are now ready to use VS Code in our project!
Launching your first Code Studio#
Back in our project, we’ll launch Code Studios and select our new VS Code template.
From the Code menu, select Code Studios.
Select Create Your First Code Studio.
In New Code Studio, select the VS Code template you just created.
Name the Code Studio
VS Codeand select Create.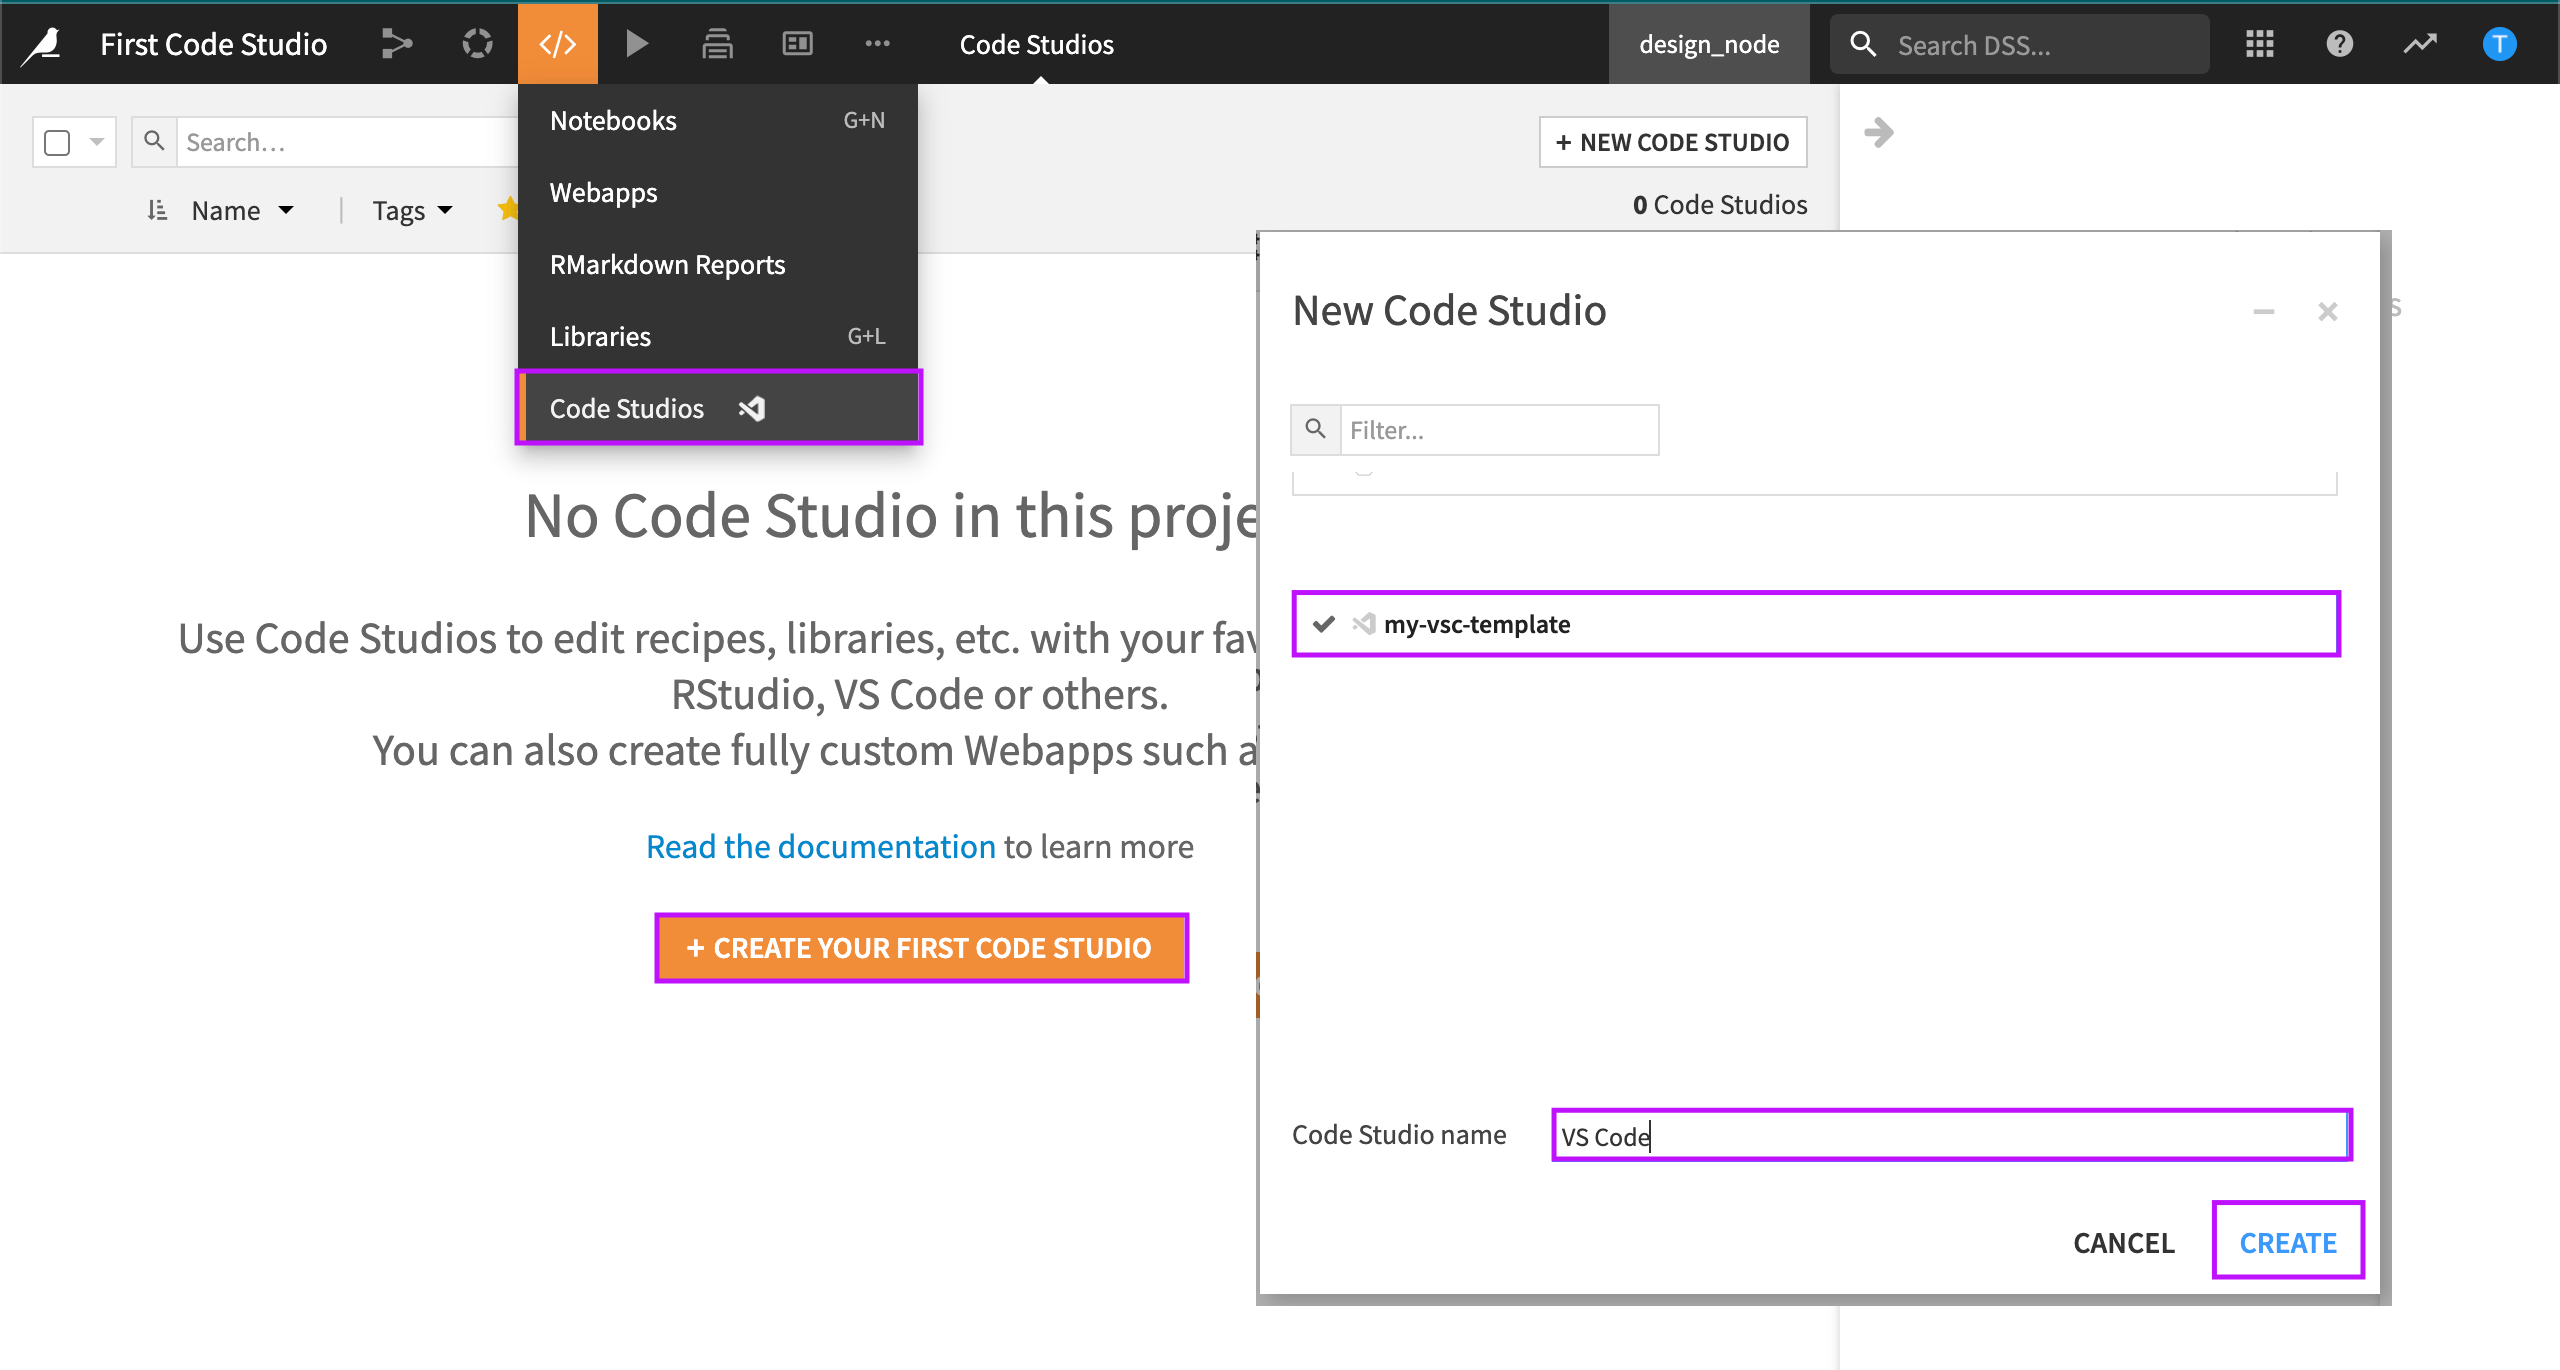
Launching a new Code Studio in a project.#
Now that your Code Studio is created, let’s start it and get a first look!
Select Start Code Studio.
Wait while Dataiku starts the Code Studio and launches it in a browser window.
Note
If it’s the first time, VS Code may ask you to trust the authors.
Click Yes, I trust the authors to move forward.
Wrapping up#
In this tutorial, you’ve learned how to set up and launch a Code Studio in Dataiku, giving you access to powerful development environments like VS Code directly within your project. By following these steps, you can efficiently create and customise templates, configure your environment, and start coding right away. Code Studios streamlines development workflows, making it easier to build, debug, and maintain your solutions within Dataiku.
If you want to deep dive into using VSCode within Code Studio, you should read this tutorial.