

How to trigger Scenarios from a Govern node#
In this tutorial, you will learn how to leverage Hooks inside a Govern Blueprint to initiate actions or more complex operations on your design node. This is particularly useful when you need certain Python packages, external connections, or want to initiate actions on the design node when a particular action happens on the Govern node.
Prerequisites#
Dataiku version 14 or higher
Dataiku Govern Node with a customisation license
A configured Govern project
An API key for the Design node
If you don’t yet have a configured Govern project, check this tutorial: Tutorial | Governance basics
Introduction#
In this tutorial, you will understand how a connection works from the Govern node to the Design node. This will allow you to initiate actions on the design node triggered by events on the Govern node.
For demonstration purposes, we’ll log events on the Govern node in a dataset on the Design node.
Setting up a scenario#
Calling a scenario from a Govern node is a best practice when you want to initiate any complex code straight from the Govern node. For this reason, we’ll demonstrate how to connect to a scenario straight from a govern node.
Creating a Design Project#
On your Design node, create a blank project and give it the name Govern Event Receiver. If no duplicates
are found, you should have a project with the key GOVERNEVENTRECEIVER. We’ll use this key in the Govern Node
to connect to the Scenario.
Create a dataset#
In this tutorial, we’ll log some simple events in a dataset on the Design node using a Scenario. Therefore, the first thing we’ll do is create a dataset to which we can log things. We’ll keep it incredibly simple, but of course, feel free to add more fields if you prefer that.
Head over to your Design node. Then, using the top navigation, head to Datasets or press G+D.
Click New Dataset and click Connect or create. For this tutorial, we’ll select the Managed Dataset option.
However, every SQL/NoSQL should work for this tutorial.
Enter the name govern_event_log, and choose your storage system. Click the Create button to initialize the dataset.
You will be redirected to the Settings tab of the dataset. From this tab click on the Schema sub-tab.
Here we’ll create 3 fields in the dataset. Click the + Add Column button 3 times, and then enter the following
details as the Name and type:
event_typewith typestringproject_keywith typestringtimestampwith typedatetime with tz
Next, click the Save button on the top-right, and return to the Connection sub-tab. At this page you can now click Create Table Now on the bottom, which should finalize the creation of your table.
To confirm the table is created, click the Explore tab and you should see the 3 columns displayed with zero rows.
See also
Create the Scenario#
Now, create a Scenario by clicking the > menu in the top navigation bar, and then click Scenarios.
On the top right, click + New Scenario and choose Custom Python Script. Give it the name Receiver and click Create.
Then head over to the Script tab and paste the script below.
import dataiku
from dataiku.scenario import Scenario
from datetime import datetime, timezone
sc = Scenario()

# Trigger parameters passed from the Govern hook
params = sc.get_trigger_params() or {}

# Dataset where we append audit rows
event_ds = dataiku.Dataset("govern_event_log")
event_ds.spec_item["appendMode"] = True

# Build the row to insert
row = {
    "event_type": params.get("event_type"),
    "project_key": params.get("project_key"),
    "timestamp": datetime.now(timezone.utc).isoformat(),
}

# Append one row to the SQL dataset
with event_ds.get_writer() as writer:
    writer.write_row_dict(row)
In the code above, you can see we’re getting the parameters sent to the Scenario through the get_trigger_params() function.
From there, we directly created a new row for the dataset we created earlier, using the provided parameters.
Test the Scenario#
Before we proceed to create the hook that sends data to your Design node, we need to ensure that the Scenario actually works.
It’s really easy to test this by using the Run button on the top right of your scenario screen. You can run it directly by clicking the button, or you can press the down arrow next to the Run button and click Run with custom parameters. Choose this and paste the following data in the dialog:
{
   "event_type": "TEST",
   "project_key": "run.button"
}
Then click the Run button on the dialog. The dialog should now close and the Scenario should’ve run.
To validate the run succeeded, click the Last runs tab, and then you should see a log like this in the left-hand sidebar:

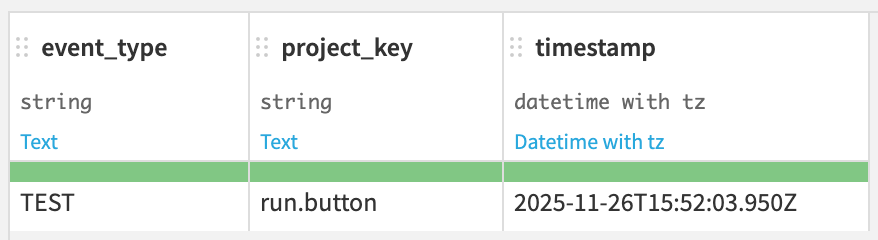
This means your scenario ran successfully. To validate it actually has written the data, head over to Datasets by
pressing G+D, and then click your govern_event_log dataset. You should see the data written in the Explore tab.
This means your Scenario ran successfully and is able to receive input from the govern node through the params. If you’ve clicked the Run button in Scenarios without custom parameters you will see some fields empty.
Create a hook on the Govern node#
Now that your Design node is ready to receive data, it is time to focus on actually sending logs from the Govern node.
See also
If you need details on setting up a Govern project or creating a blueprint (version), use the links below
First thing you’ll need to do is find your governed project in the Govern node. Navigate into your project to start our tutorial.
Hint
Your Govern project does not need to be connected to a design project for this tutorial to work. So if you do not have a ready-to-go configured Govern project, it’s fine to create one from a template. Just make sure you have an editable Blueprint to work with
Create the blueprint#
When you’re in your Govern project, click the Additional actions button next to the Edit button. Then click Edit blueprint version. You’ll navigate to the blueprint page. On the left-hand menu, click the Hooks button.
Hint
Using this flow brings you to the currently used Blueprint version in your Govern project. Keep in mind that more than one version of the Blueprint can be in use, and your edits only apply to the one you selected.
From there, create a new hook using the blue + button on the top of the sidebar.
For the name, enter something like Log actions and select all Phases in the dropdown: Create, Update, and Delete.
Then, in the script section, enter the necessary imports.
from govern.core.handler import get_handler
import dataikuapi
import logging

logging.basicConfig(level=logging.INFO)
logger = logging.getLogger(__name__)
Configuring connection#
The next step is to define constants to connect to your Design node. You will need to provide the URL of your node, an API key, Project ID, and Scenario ID.
# URL of the instance that hosts the Design project
DSS_URL = "https://dss.example.com/"

# API KEY that has access to the Scenario on your Design Node
DSS_API_KEY = "API_KEY"

# Target project and scenario on the Design Node
TARGET_PROJECT_ID = "DESIGN_PROJECT_KEY"
TARGET_SCENARIO_ID = "SCENARIO_ID"
Hint
You can get an API key on the design node by clicking on your profile on the top right and then clicking on the Cogs to go to Profile and settings. There you will have a tab called API keys. Create a new API key and give it a descriptive name and description.
If you have the created Scenario open you can retrieve all the relevant details straight from the URL.
https://[DSS_URL]/projects/[TARGET_PROJECT_ID]/scenarios/[TARGET_SCENARIO_ID]/script
Defining the payload#
The next section of our Hook code will define the payload. We’ll need to extract some information from the handler
to log the details we discussed earlier. Then we’ll define a function to create the payload we’ll send
to the Scenario.
handler = get_handler()

enriched = handler.newEnrichedArtifact
artifact = enriched.artifact

def build_event_payload():
    definition = artifact.json

    project_key = definition.get("name")

    event = {
        "event_type": handler.hookPhase,
        "project_key": project_key,
    }

    return event
We’ll call the function above in a next step.
Trigger the Scenario#
Triggering the Scenario is straightforward with the imported dataikuapi. We’ll connect to the Design node
using the URL and API_KEY, and then we’ll define the project and scenario with the relevant IDs defined
in our configuration step.
From there, we’ll only have to use the scenario.run function with our payload.
def trigger_dss_scenario(event_payload):

    dss_client = dataikuapi.DSSClient(DSS_URL, DSS_API_KEY)

    project = dss_client.get_project(TARGET_PROJECT_ID)
    scenario = project.get_scenario(TARGET_SCENARIO_ID)

    run = scenario.run(params=event_payload)
Putting it together#
Now that we have both relevant functions defined it is time to put them together and actually call the Scenario properly.
try:
    payload = build_event_payload()
    trigger_dss_scenario(payload)
except Exception:
    logger.exception("Failed to trigger DSS logging scenario")
If you have pasted all blocks of code so far consecutively, you have completed the relevant code.
You can now click Save in the top-right button.
Your full code in the hook should match this:
from govern.core.handler import get_handler
import dataikuapi
import logging

logging.basicConfig(level=logging.INFO)
logger = logging.getLogger(__name__)

# URL of the instance that hosts the Design project
DSS_URL = "https://dss.example.com/"

# API KEY that has access to the Scenario on your Design Node
DSS_API_KEY = "API_KEY"

# Target project and scenario on the Design Node
TARGET_PROJECT_ID = "DESIGN_PROJECT_KEY"
TARGET_SCENARIO_ID = "SCENARIO_ID"

handler = get_handler()

enriched = handler.newEnrichedArtifact
artifact = enriched.artifact

def build_event_payload():
    definition = artifact.json

    project_key = definition.get("name")

    event = {
        "event_type": handler.hookPhase,
        "project_key": project_key,
    }

    return event

def trigger_dss_scenario(event_payload):

    dss_client = dataikuapi.DSSClient(DSS_URL, DSS_API_KEY)

    project = dss_client.get_project(TARGET_PROJECT_ID)
    scenario = project.get_scenario(TARGET_SCENARIO_ID)

    run = scenario.run(params=event_payload)

try:
    payload = build_event_payload()
    trigger_dss_scenario(payload)
except Exception:
    logger.exception("Failed to trigger DSS logging scenario")
Trigger the hook and see the results#
We’ve completed all the code; now it is time to see it in action. Return to your Govern project and trigger an event that you’re monitoring. If you’ve selected all methods, so Create, Update, and Delete, then you can edit anything on the Overview or in one of the Workflows, for example.
Once you edit something and click Save again, it could take a few seconds for the hook to complete its action.
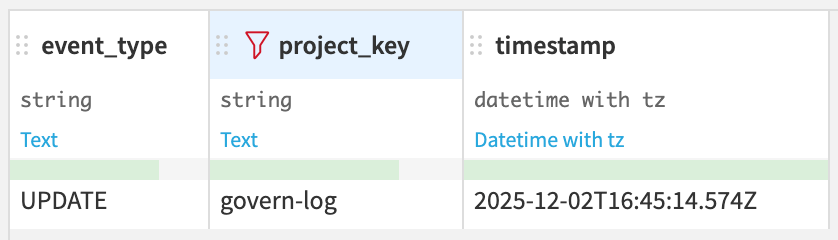
After a few seconds, return to your Design node, go to Datasets, and preview your govern_event_log table.
In there, you should now see another entry with the UPDATE event_type, and it should have the Govern Project name logged as well.
It should look like this:
Conclusion#
In this tutorial, you wired the Govern and your Design Node together: A hook reacts to lifecycle events in your Govern project, builds a small JSON payload, and calls a DSS scenario.
This, in turn, appends each event as a row in a PostgreSQL dataset. The result is an audit table that grows over time with event_type, Govern artifact ID, and a timestamp.
The same pattern goes beyond simple logging. You can route to different scenarios depending on the event type or logic, add more context from the artifact to the payload, or replace the logging with anything that is possible within Dataiku.
This allows you to write complex actions using simple hooks.
Reference documentation#
Classes#
|
Entry point for the DSS API client |
|
A handle to interact with a scenario on the DSS instance. |
Handle to the current (running) scenario. |
Functions#
Returns a dictionary of the params set by the trigger that launched this scenario run |
|
|
Request a run of the scenario. |